
You are currently browsing the category archive for the ‘Tutorials’ category.
Hello everyone!

Today is my first tutorial for Sew Mama Sew and just in time for Halloween. The tutorial is for the Zombie Love Mini Quilt. I do hope you get a chance to head over there and take a peek. To celebrate, I’m having a giveaway on my Instagram page. Head over there to find all the details so you can win this Zombie Love Quilt!
If you don’t have an Instagram account, download the app to your phone or iPad. Instagram is a virtual show and tell. It’s so fun to see all of the fabulous work everyone does to keep you inspired and creative. And who doesn’t like to show off their quilts & sewing projects?!
You can find me @smorielorrie ….Come check me out!

A quick way to add some dimension and decorative flair to your quilt is by adding a flange. On the pattern, Backyard Baby, we add it as one of the ways to transition the borders from one to the other. A flange can be used between borders or before you attach your binding. Using Backyard Baby as our pattern, I’m going to show you just how easy adding a flange is!
Cut (3) 1″ strips WOF.

Connect all 3 strips on the diagonal…just like you would when you prepare a binding.

Trim the seam to 1/4″ and press open.

Press your flange wrong sides together lengthwise.

Starting on one side of the quilt, place raw edges together and lay the folded edge of your flange facing in towards the quilt.

At this point we’re basically going to baste the flange to the quilt. I use a normal stitch length and about an 1/8″ seam allowance.

When you come to the end of the first side of the quilt, stop and trim the flange even with the bottom.
You’ll notice that I did not cut and measure my flange according to the length of each side, but instead left all three lengths a continuous piece and trimmed as I went. Since Backyard Baby is a small quilt, I feel the risk of stretching it out of proportion is minimal…and I’m a wee bit lazy… But if you feel you’d rather cut the specific flange lengths, then you would first cut (4) 27-1/2″ pieces and proceed with the following steps. If you are adding a flange to a larger quilt or the binding on a different quilt, please measure your sides and pre-cut your flange accordingly to ensure that you do not stretch your sides. This will keep your quilt ‘squared up’.

Turn the quilt to work on the next side. Place your flange right on top of the first flange, and continue basting this side until you reach the bottom, and trim again.

Repeat for all four sides of your quilt.

At this point, you’ll begin adding your borders, right on top of the flange, using a 1/4″ seam allowance. Basically pretending your flange isn’t even there. And your end result should look something like this…

Are you ready to make pillows?

I’m going to show you how to stitch a 3-1/2″ Road To Tennessee quilt block and construct an 18″ pillow cover. Let’s begin!
To make each Road To Tennessee block, you’ll need (1) 3-1/2″ Dinosaur square and (2) 2″ background squares for a total of (36) 3-1/2″ Dinosaur squares and (72) 2″ background squares to complete your pillow top. Draw a diagonal line on the back of each square with a pencil.

With right sides together, place a white square on each opposite corner of an 3-1/2″ square. Stitch on the line.

Trim a 1/4″ away from the stitched lines.

Press your seams open. *This reduces bulk and makes it easier to match your seams on this particular block.

Lay your pillow out in a 6×6 setting and rotate the blocks as shown and sew.
Cut a 19-1/2″ piece of batting. This is where all those batting scraps come in handy!
Layer your pieced pillow on top of the batting, pin and quilt as desired. I quilted a 1/4″ on each side of my seams.

Trim to an 18-1/2″ square.

Cut (1) 18-1/2″ square of fabric. This will be your pillow lining. I use a lining on my custom orders because it hides all of the quilting/threads and batting for a more finished look.
Cut (2) 13″x18-1/2″ pieces for your pillow backing.
**Place your quilted pillow on top of the 18-1/2″ lining. ‘Square up’ and trim any excess to make them the exact same size. Sometimes after quilting your work, it ‘shrinks‘ a bit, so if your top doesn’t exactly measure 18-1/2″, that’s still ok. Just make sure that your pieces are the same size as your top. This will help when stitching through all of your layers when sewing your finished piece together.
For the pillow backing, turn under 1/2″ on the 18-1/2″ long side and press. Turn under again, press and top stitch the hem for each piece. Attach your label now if you have one. I stitched mine on the outer backing part of the hem. You now have 4 pieces for your pillow.

Layer them in the following order and pin, being careful to match all of your seams. Pin well.

Pillow liner right side down.
Pillow top right side up
Outer backing piece right side down
Inner backing piece right side down
Stitch around your pillow with 1/2″ seam. Clip your corners . Zig Zag around your raw edges to decrease fraying.
Turn your pillow cover right side out through the backing envelope. Push your corners out and insert your 18″ pillow form.
You’re all finished!

The possibilities are endless when it comes to these covers. Need a quick Christmas gift? Make them for any holiday. Make them with different 3-1/2″ quilt blocks or how about one quilt block. It just needs to be an 18-1/2″ unfinished square to make this pillow!
Here’s a patchwork Christmas pillow I made with some of my leftover Alpine Wonderland scraps.

Keep an eye on my Instagram feed. I’m sure there are more pillow examples coming this holiday season!

…the Enderman. The MineCraft Quilt Kits have been so popular and many of you have asked for different versions and sizes.
So let’s start with the Enderman shall we?
The Enderman is available in two sizes just like the Creeper, a small throw (45″x54″), which is perfect for the game room, a wall hanging, or your bitty one, and the twin/full (54″x72″), which is perfect for their bed.
***Standard mattress sizes for a twin measure at approx. 39″x75-79″ and a full measures at 54″x75″.
This quilt KIT will fit a twin and provide a drop over the mattress on the sides. It will be a few inches shy on the length, but a pillow at the top fixes that:) We keep the sample MineCraft quilt on the twin in the studio, and it looks great!!
Here’s a quick how-to on the Enderman layout and the fabric requirements.
The throw (45″x54″), is a 10×12 setting and uses the following fabrics:
 2 Yards Black(includes binding)
1/3 Yard Pepper
5/8 Yard Charcoal
1 Fat Quarter Dark Violet
1 Fat Quarter Hibiscus
Backing 2-2/3 yards for machine quilting
Batting
The twin/full (54″x72″) is a 12×16 setting and uses the following fabrics:
 3-1/4 Yards Black(includes binding)
1 Yard Pepper
¾ Yard Charcoal
1 Fat Quarter Dark Violet
1 Fat Quarter Hibiscus
Backing 3-1/3 yards for machine quilting
Batting

Each letter is a 5″ square unfinished. Lay your quilt out, depending on which size/setting, and refer to the photo. Each Kona color has a letter representing the placement. For example, B=Black, P=Pepper, etc. Use the remaining black fabric to cut your 2.5″ binding strips.
For more info on cutting and assembly for the MineCraft quilts, click on the tutorial found here.
***UPDATE 12/20/16 All Enderman kits are sold out from this page. Please visit the Etsy shop if you are interested in purchasing a kit. Thanks!

The Enderman kits are also available to purchase. The kit links are below.. Each kit comes with a tutorial, fabric for the top, binding and choice of backing. Batting NOT included. Please choose which backing you’d like in the notes section when you checkout with PayPal or convo me.

**********************INTERNATIONAL CUSTOMERS**************************
KIT SHIPMENT: Once again, if you are an international customer, please convo me as shipping rates are different for each country. International shipping rates are set by the USPS and KITS are mailed in a flat rate mailer. SewMod does not charge our customers for any ‘handling fees’. A separate PayPal invoice will be made available to you after you convo me with the package destination. I’m happy to help! Thanks.
If you’d like to purchase an Enderman quilt KIT in the THROW (45″x54″) size, click on the PayPal button below. The throw is $48.50 plus shipping.
KIT SOLD OUT
If you’d like to purchase an Enderman quilt KIT in the twin/full (54″x72″) size, click on the PayPal button below. The Twin/full is 68.50 plus shipping.
KIT SOLD OUT
If you’d like to purchase a Creeper KIT in either size, please click HERE.


Equilateral?! Yuck. Geometry. Pretty much the only class I actually cheated in during high school. If I’d only known I’d be doing it as a business and hobby! The truth is, we use geometry & math every time we quilt…hexagons, triangles, squares & fractions. But sometimes we tend to get hung up on the ‘words’ until we’ve tried it. An equilateral triangle simply means that all 3 sides are equal. I’m going to be showing you a 60 degree equilateral quilt today with 2 methods to cut out the triangles.

I wrote this ‘little‘ tutorial for a new baby quilt KIT for the shop using equilateral triangles and Riley Blake’s fabric line called ‘Good Natured”. It really is a sweet quilt with the orange & mint…adorable nature friends… squirrels, baby deer, sweet little bluebirds and playful foxes among birch trees!

I was both excited and nervous to make something with so many bias edges but it went together beautifully! Now that I know just how awesome it was, think of all the scrappy triangle quilts I could make. Oh, if I only had more time!
Since I learned a few tips along the way to make this quilt, I figured I’d pass it along to you guys.
Fabric supplies needed for a 35″x42-1/2″:
3/8 yard of 7 different fabrics
3/8 yard Binding- Cut (5) 2-1/2”
1-3/8 yard Backing
60 degree Creative Grids triangle ruler (method 1) or…
The Template. Grab some colored paper or craft foam & double sided tape (method 2)
Cut each of your 7 different fabrics into 3 strips of 4-1/4” wide. This is the same height as your triangle template or ruler.
A ¼” seam allowance is used for sewing and ALL seams are pressed open. Do not iron your triangles or rows. This will cause stretching. Press.
There are two methods I like to use to cut 60 degree triangles. To make the cutting as precise as possible, choose only one method per project to cut all of your equilaterals.
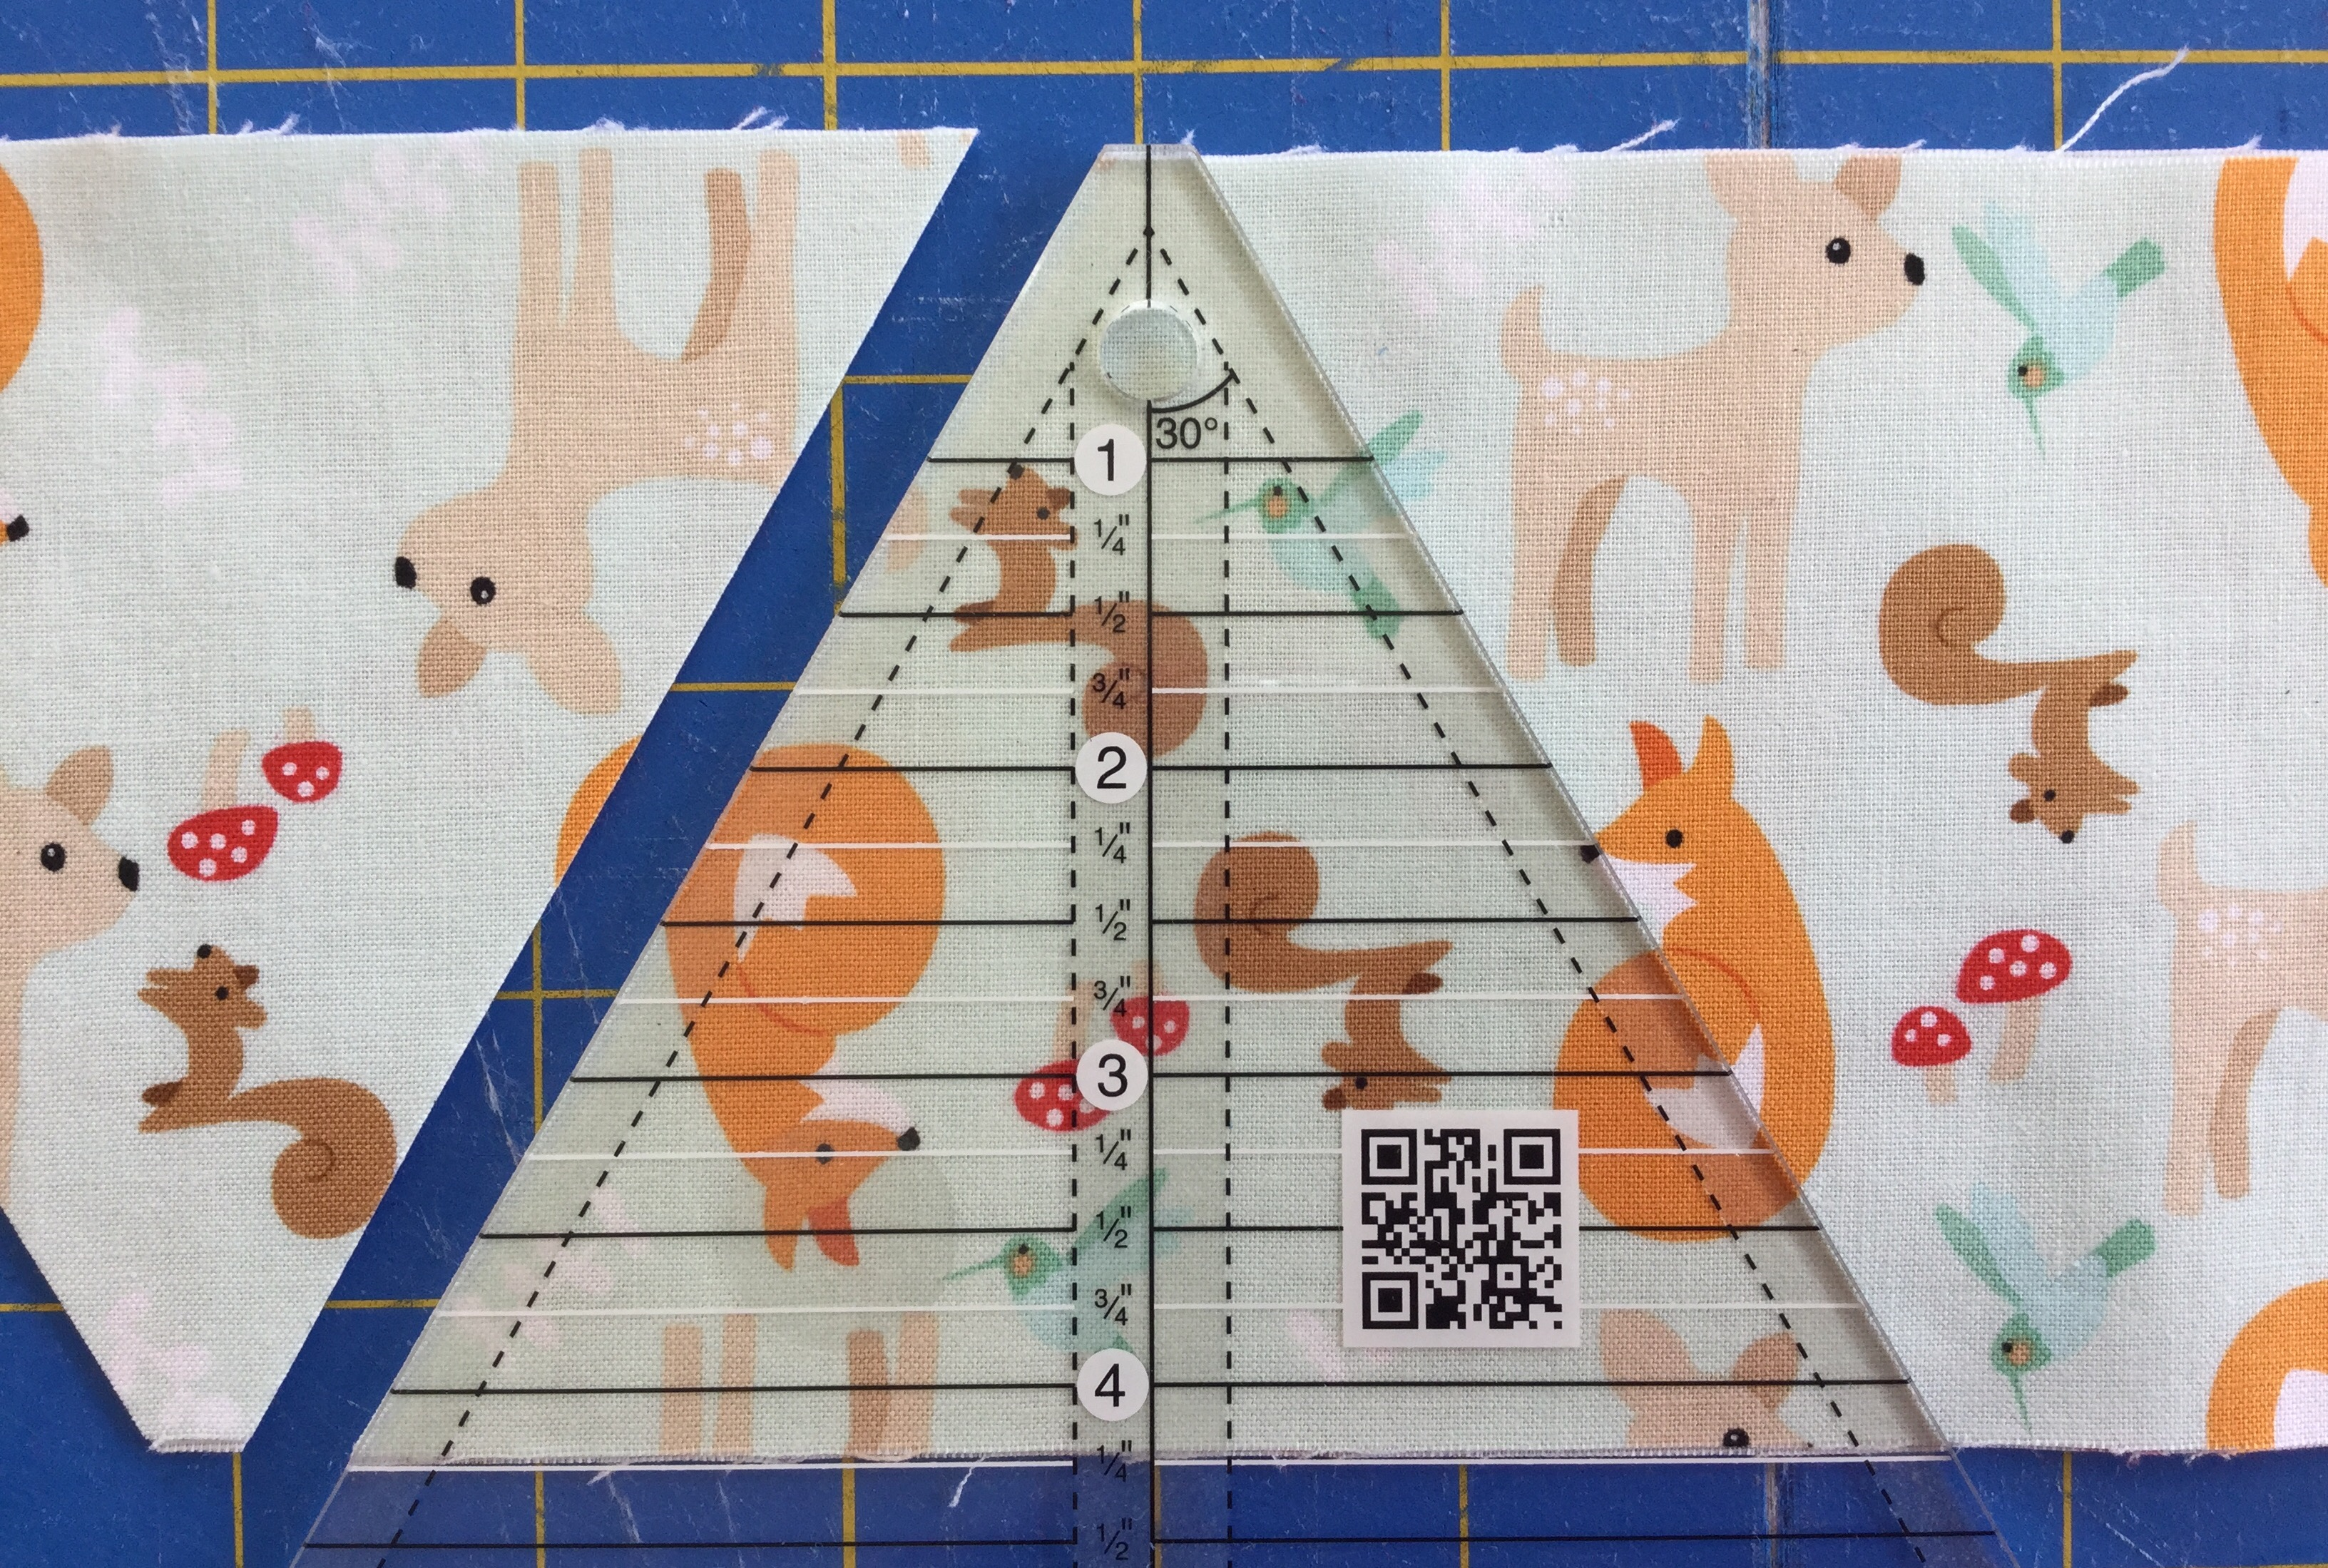
Method 1: Creative Grids 60 Degree Ruler
This ruler is found in the SewModDesigns Etsy shop. Place the ruler on the strip of fabric. The 4-1/4” mark should line up with the bottom of the strip and the squared off tip of the triangle should line up with the top of the strip.
The first thing we need to do is cut a 60 degree angle. Discard the extra fabric with the selvage on it.

Rotate your ruler so that the top of the fabric strip lines up with the 4-1/4” marking and the squared off tip lines up with the bottom of the strip. Use the edge of the ruler to cut your triangle out.

Flip your ruler, line up the markings, and cut again. Repeat this flipping method until you have made 6 cuts with the ruler, giving you 12 triangles per strip.
And for all of you hittin’ it old school…
Method 2: Using the template, found here, & a ruler
Cut the provided template out onto colored paper. We want it to be colored so that we can see it easily through the ruler. It makes it difficult to see if we use clear template plastic. I used a piece of craft foam for mine. I like the foam because it ‘sticks’ to the fabric while I’m cutting. These sheets can be found at your local craft & hobby store.
Place three pieces of double-sided tape to the back of your template. Turn your ruler over to the backside and adhere the template to it, lining up the bottom edge of the template along the side of the ruler. Don’t worry. It won’t leave your ruler sticky after you remove it.

The first thing we need to do is cut a 60 degree angle. Line the 60 degree mark on your ruler with the bottom of your 4-1/4” strip and trim off the selvage angle. Discard the extra fabric with the selvage on it.

Using the colored foam as the guide, line the foam triangle up with two sides of the strip…the top and the left side as shown in the photo. Cut.

Turn the ruler and line up the foam triangle with two sides of the strip…the bottom and the left side. Cut.

Repeat this turning method until you have made 6 cuts with the ruler, giving you 12 triangles per strip.

**All of your triangles have the top squared off. It determines the top & bottom of the triangle and keeps the straight of grain going in one direction for minimal stretching.
Using your preferred method, cut at least 216 triangles from the fabrics. The fabric requirements provide enough fabric for you to cut as many as 252 triangles so that you can mix it up to your liking and play with the placement or make baby a matching pillow with the extras!
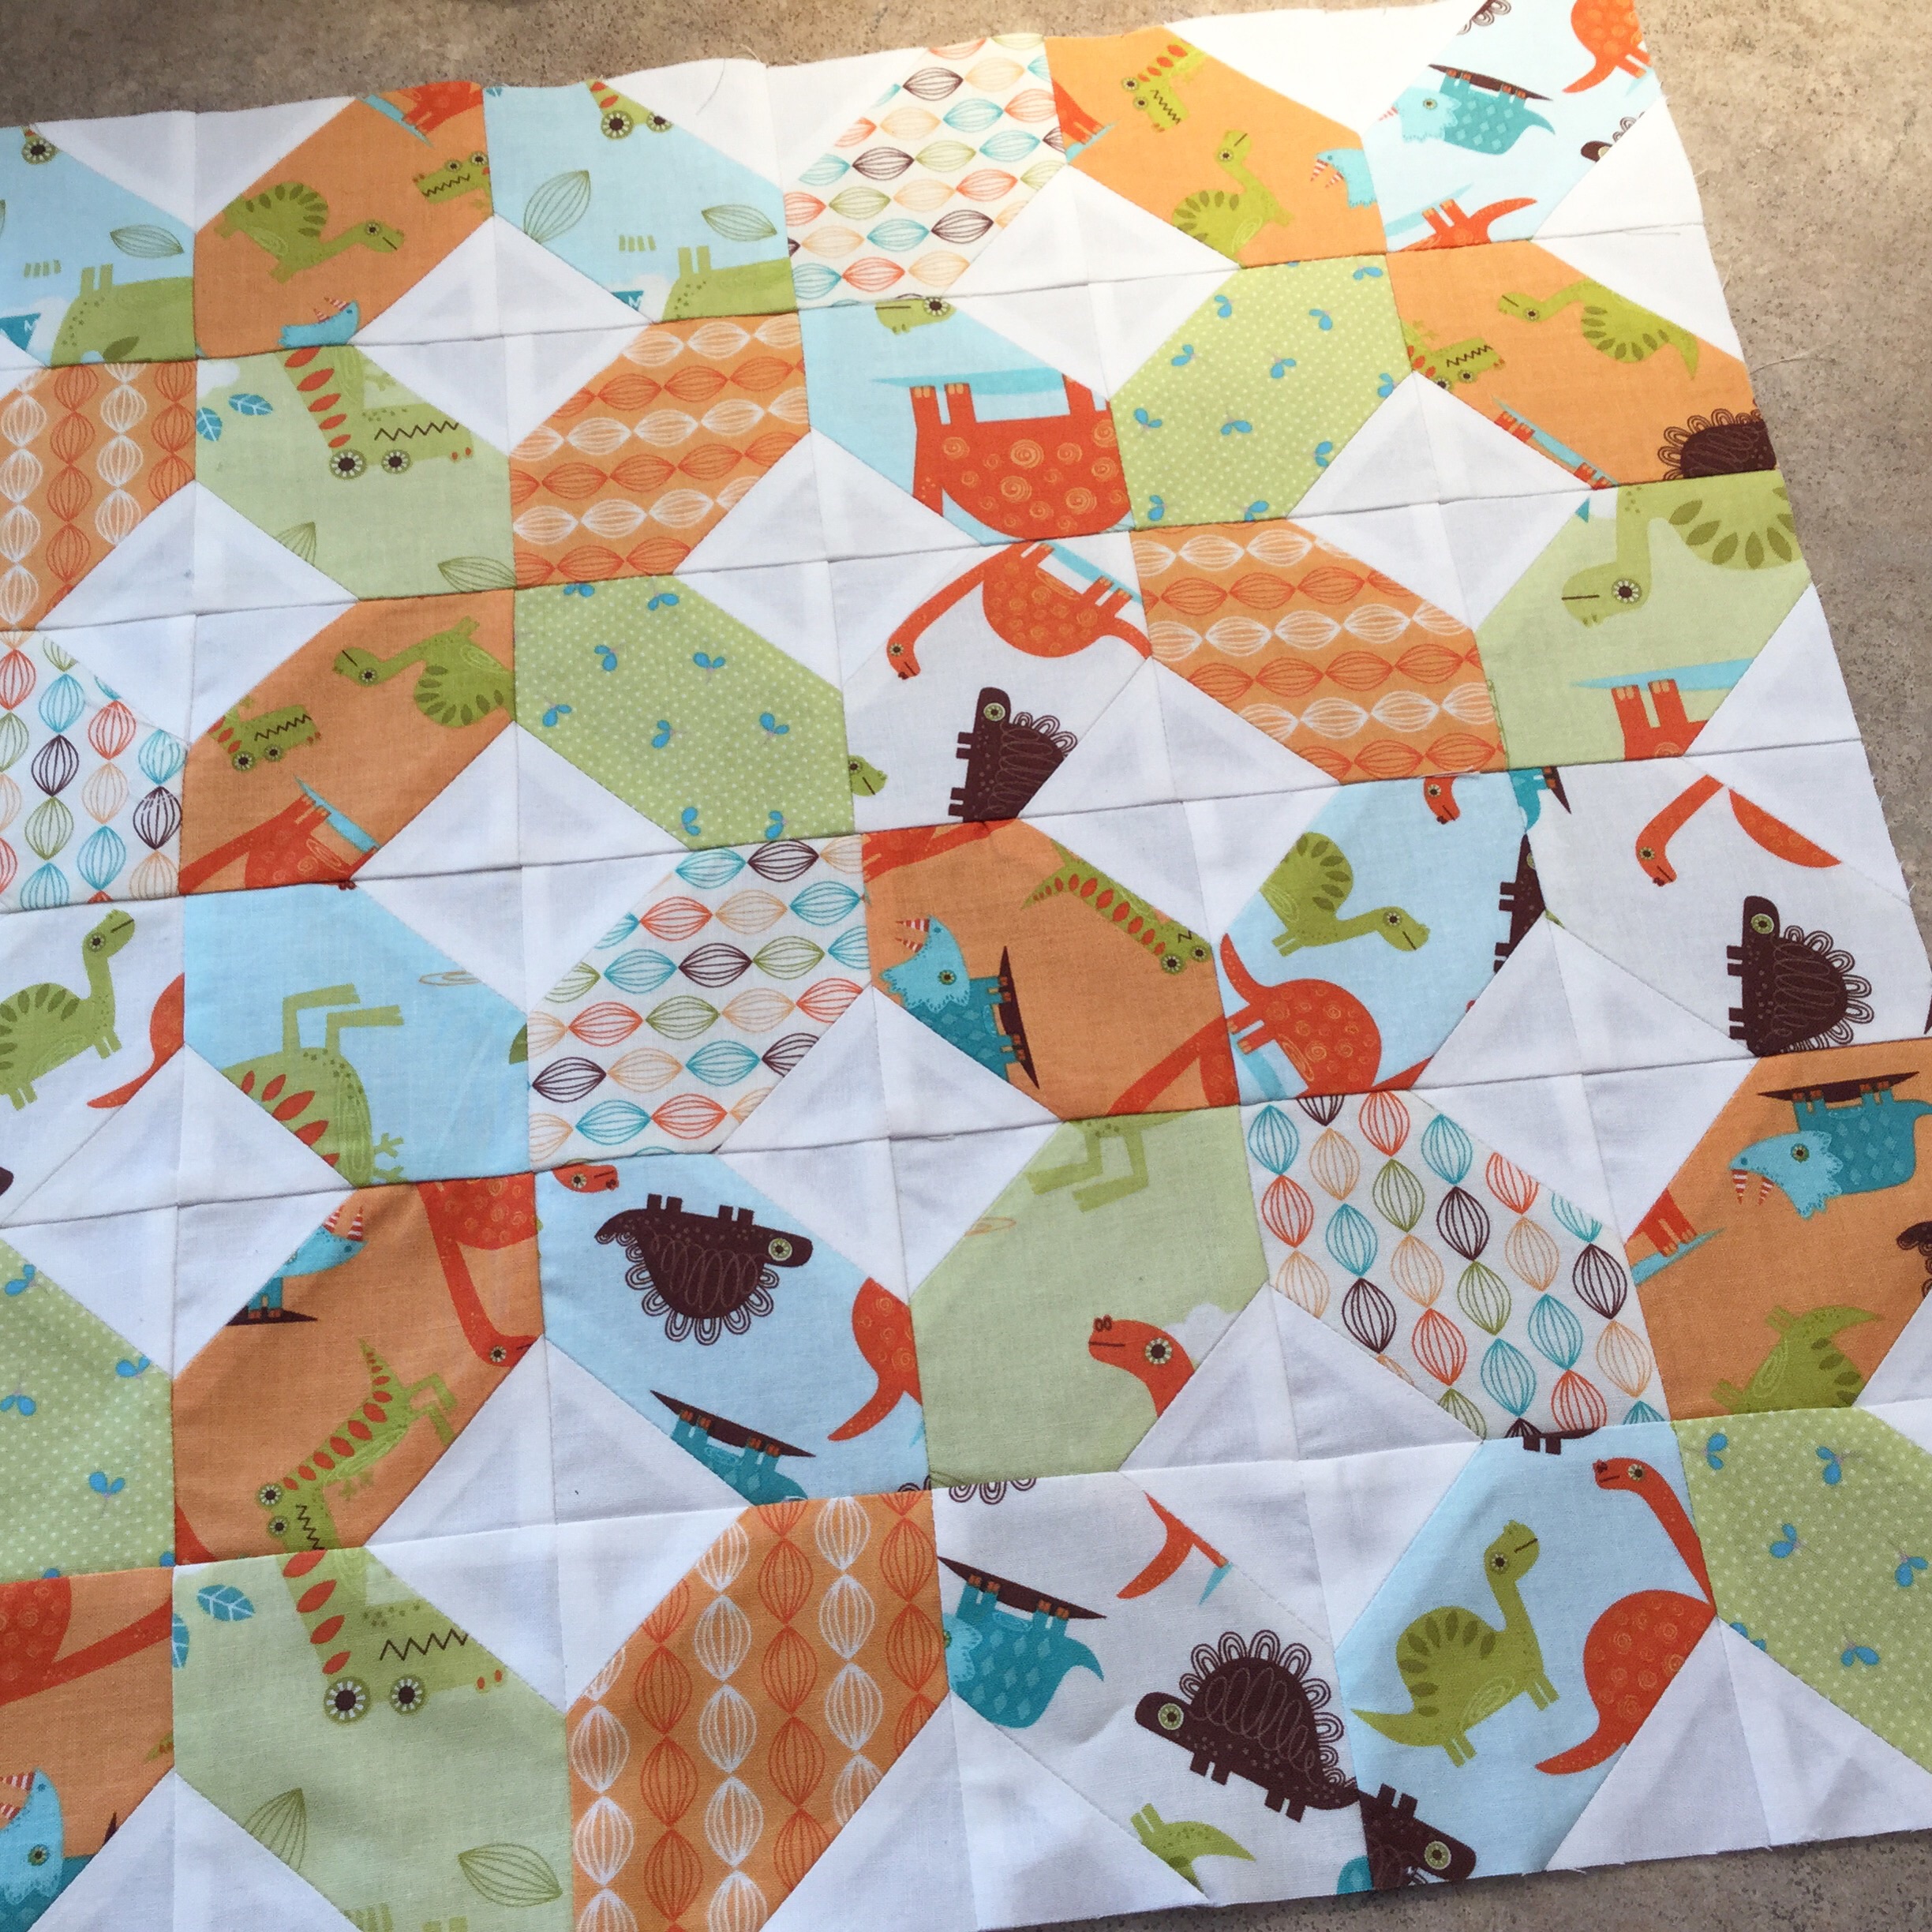
Lay your quilt out in a setting of 18 triangles across by 12 rows down.
Referring to the photo…
1. Place triangle 1 & 2 of the first row right sides together, matching up the top and all the edges.
2. Sew these together down the side using a 1/4” seam allowance.
3. Press the seam open.
4. Layer triangle 3, right sides together, on top of triangle 2. Sew. Press open. Repeat this process until you have 18 triangles pieced together and 12 rows total.
Join your rows together.

Trim off all of the ‘rabbit ears’ and threads.
Here are a few tips I use to line up the points on the equilateral triangles.
1. Place row 1 & 2 on your ironing surface right sides together.
Match up the triangle points. Insert a pin directly into the back of the triangle point on the top row. This is your ‘push pin’.
2. Now insert that same ‘push pin’ into the bottom row directly into its matching triangle point.
3. Push that pin onto the ironing surface to secure the row at that spot.
4. Place one pin on each side of the ‘push pin’. Remove the ‘push pin’.
Do this for all of the triangle points in each row.
5. Sew a ¼” seam right through the intersecting point. Press your seams open.

That looks like a pretty good matching point, don’t ya think? Yes! It really is that easy!

Trim the side edges of the quilt top. Make sure to leave a 1/4 “seam allowance from the triangle points on the sides to attach the binding.
Quilt & Bind. I want to give a shout out to my friend Isis, who did the fabulous quilting on the sample!

If you’d like the complete kit featured in the post and a free copy of the pattern, it can be found in the Etsy shop. Each kit comes complete with quilt fabrics, binding and backing.
I’ve been swapping for about 4 years now through various social media sites and within our local sewing group and guild.
Different types of swaps may include specific blocks, sizes & color combos. Handmade items such as pincushions and zippy bags. Some have strict rules that must be adhered to and some only have a theme to follow, such as butterflies, in which anything can be swapped as long as it has a butterfly.
Overall, I find this quilting activity rewarding and enjoyable and I’ve made many online friends doing it. I have had a few swaps that have proven to be challenging. For example, the color scheme is ‘off’ or the blocks I receive may be shy of the dimension requirements, but this never stops me from saying…”yes” to the next one!
Today I’m going to share with you a few tips, mainly focusing on block swaps, to help make your next swap successful for you and your partners.
Use quilt store quality fabrics for your swaps.

Use precise cutting. This is where it all starts. Accurate cutting will help ensure the desired block size. Here’s a quick refresher on Craftsy for tips on using your rotary cutter and mat.

Double check your seam allowance. A 1/4″ seam allowance is typically required for quilting. If your 1/4″ is off, your block will not finish the correct size. Invest in a 1/4″ foot for your machine. The 1/4” foot has a guide designed to help you achieve perfect 1/4” seams when piecing. The distance between the needle and the right guide is a true 1/4”. Or, stack painters tape as a reference along the plate to guide you.

Don’t sacrifice quality for quantity. Slow down your pace, it’s not a race! Take your time with each block.
Measure your block before swapping. A good Sewista is most likely to be able to work with about 1/8″ of your block being off . After all, we are not perfect.
1/8 + 1/8 = 1/4″ total.
But, if your block is 1/4″ off on each side…
1/4 + 1/4 = 1/2″ *this is not workable. No amount of “stretching” can resolve this problem y’all!

As you can see, my block is slightly off. Mostly, because I can’t seem to sew a straight line to save my life even while using my fancy pants 1/4″ foot but it is still well within an accepted allowance…within the 1/8″ allowance.
Press your work well after each addition. Press your seams flat, whether it be open seams or pressed to one side. Do not “iron”. This will cause stretching. Use Best Press or other solutions to “starch” your finished project. Nothing makes me smile more than a well pressed block. It’s my finishing touch. If your block is pressed, you will be able to make an accurate determination of whether it is the correct size.

One of our guild members, Trish, was kind enough to share her recipie for a homemade pressing spray if you’d like to make your own.
Mix a ratio of 4 parts water with 1 part POTATO vodka.
Add to a spray bottle. It’s important that it be POTATO vodka. Ask your local wine & liqueur store if they carry it.

Follow the design elements required for the block swap. For example, if your swapping for Halloween, and your swap partner or leader asks for a certain block size or color palette, try to accommodate those requests as closely as possible. This will ensure a cohesive final quilt for whoever is making it.

Don’t hesitate to ask for guidance. Like I mentioned, we are all here to learn from each other. I literally need Paige to explain paper piecing every. single. time. I do it! It’s ok to ask for help. Everyone has their own level of experience and what they are skilled in.
Use good judgement. Ask yourself…”Is this something I would want to receive“? Make something you don’t want to give away. Because if you love it, so will someone else.
Mail your project on time. If you have joined an online swap through sites such as Flickr or Instagram, make sure to mail your project or block out in time. Your swap partner will anxiously be awaiting it’s arrival. You wouldn’t want to dissapoint her!
Have fun! Use quilt swaps to make new friends, expand your sewing skills and be creative. But remember, the most important part, is to have fun!

Supplies needed for tutorial:
2 pieces of Scraps approx. 11″ x 6″
Batting
Button
Thread/embroidery floss
Elastic tie…these can be found in the hair accessory section at your local Target. They are the tiny ones. They come in all black or a multi colored selection.
Disposable coffee cup
The CLMQG is going to be vending at the Spring Fiber Fling May 16th-17th in Woodstock, IL to promote the guild, raise funds and entice new members to join our fabulous group. In doing so, the members are making small handmade items to sell, such as bookmarks, pincushions, zipper bags, and…coffee cozys!
Now, I know that I’ve already shown you a tutorial on these but I think it’s time to revisit the project. The previous one was a scrappy cozy with embroidered stitches. This one is your ‘not so plain Jane’ one…modern, whimsy and with just a touch of detail.
These are so easy ya’ll! I made 4o of them in 2.5 days plus I wrote this little tute for you. So let’s get started, shall we?
First, you’re going to print the pattern. We’ll use the previous pattern because it works just fine. You can find it here. Cut the pattern out on the solid line.
Dig through all of those scraps. Find something fantabulous! After all, you want everyone at Starbucks to be jealous that your coffee wears a ‘designer’ cozy.

Press and layer your fabrics. Outer fabric face up, inner fabric face down and your batting on top. Pin your pattern on top and cut the fabrics out. See. I told you to never throw those scraps out!!

Cut the elastic tie where it was fused together. Snip that part off. Some of them have a little metal piece in them and we wouldn’t want to stitch that. Cutting it also helps release the tension so that it stays in place without wiggling around.

Take the cozy sandwich to your machine. Fold your batting and inner fabric back a bit and place your elastic tie on the outer fabric with the loop facing inward. Take a few stitches to secure into place.

Re-layer your fabrics. Stitch the sandwich with a scant 1/4″ all the way around the cozy, leaving about 3″ for turning right side out. Make sure to back stitch at the beginning, over the elastic tie for stability, and again at the end. Clip your corners.

Turn right side out through the opening. Push your corners out with a thingamajig and press the cozy. Turn the unfinished seam allowance in and top stitch close to the edge around the entire cozy. I like to top stitch using a coordinating Sulky thread. I like it. It’s shiny. If you have a label you’d like to attach, do so now.

Wrap your cozy around your disposable cup to measure the placement of your button. I marked mine with a pin for the demo. Use a pencil to mark your button spot. Make it snug. Your cozy will be used over and over again. You don’t want your coffee to lose its cozy at Starbucks…A naked coffee cup? How embarrassing!

Use coordinating embroidery floss to attach your button.

You’re all finished! So easy and what a great gift for your friends, secret pals, or teachers.
If you’re in the area, come visit our booth at the Spring Fiber Fling. We’d love to see you!
Spring Fiber Fling
May 16, 2015 – May 17, 2015
Saturday 9:00 am to 5:00 pm, Sunday 9:00 am to 4:00 pm
McHenry County Fairgrounds
11900 Country Club Rd.
Woodstock, IL 60098
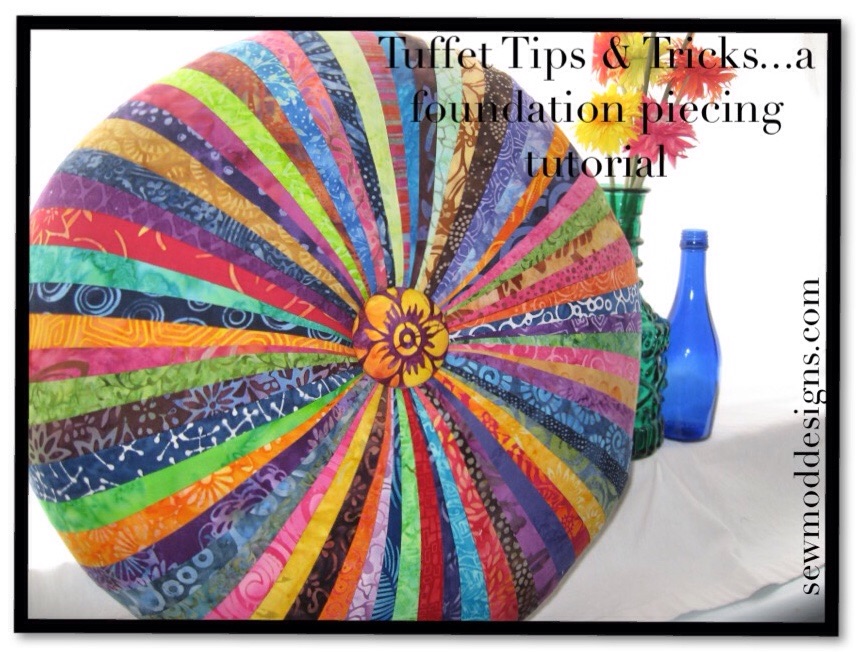
I get pretty dang excited when I sell a Tuffet pattern. Especially when I sell several of them to the same part of the country. Which means most likely, that a quilt shop is having a class. Somebody’s having a Tuffet Party!
I get all kinds of questions about the innards and the how-to on assembling the Tuffet, where to buy supplies, what fabrics to use, etc. So today, I’m gonna kill two birds with one stone. I’m going to finish up my UFO Tuffet and answer some of my customers pressing questions.
Because let’s face it, this list of supplies might seem a little daunting. But don’t fret, everything can be easily found at your LQS, craft or hardware store. The only thing you might have trouble finding, is your handyman.
I put a supply chart together showing the Supply, The Use, Where To Buy, Cost, & any Comments I have that might help. **This is for guidance purposes only** You can buy whatever you want from whomever you’d like. I’m only stating what I purchased and from where to try to help anyone making the Tuffets. If you’re taking a class at your LQS, there will likely be a Tuffet kit available for purchase. I highly recommend buying the kit. Unfortunately, for our party, we weren’t that lucky and we had to figure it out on our own. I hope this helps and you enjoy making your Tuffets as much as we did!
So let’s get this party started, shall we?
First you need The Tuffet pattern by Myra Mitchell. The foundation piecing demo and tips provided does not, in any way, replace the fact that you still need the pattern! I’ve only provided you with TIPS for building your Tuffet, not instructions on assembly. You don’t want to invest all your time and $$ in this project, only to realize that your missing key steps and correct templates. Even I still refer to my pattern for each Tuffet I assemble!
UPDATE: 01/04/18 SewMod is sold out of the Tuffet patterns. Please visit Etsy.com to purchase a tuffet pattern from a sewing or quilt store.

UPDATE 3/8/16: Myra has changed the board dimensions on the most RECENT patterns from a 18″ round plywood to a 17″ round plywood. All other supplies remain the same including the 18″ foam pieces. PLEASE NOTE this when printing off the PDF below.
SUPPLIES:Click on the table below to enlarge OR download the PDF as a reference HERE

**Remember that if you’re buying items from your local big box fabric & craft store, to use your coupons to significantly reduce the prices on select items.
**Items such as needles, adhesive spray, stain, & freezer paper can be shared if you’re making Tuffets with your friends!
FOUNDATION PIECING:The method of stitching your fabric pieces directly onto a foundation fabric such as muslin.
Foundation piecing onto the muslin will provide support and stability to this project and keep the fabrics from stretching when you begin to attach them to the base. Muslin will not pull apart.
Once you’ve traced your foundation template onto freezer paper and cut the muslin fabric pieces, trace the stitching lines. You can see from the pic that if you use a Sharpie to trace the stitching lines onto the freezer paper, you will be able to easily see through the muslin for tracing. I used a ruler and a Pigma pen to trace my lines onto the muslin. Make sure to trace the numbers from the pattern onto the muslin.

I used my leftover Batik scraps from various projects to make this Tuffet. I like using scrap pieces that are at least 2-1/2″W x 22″L . It makes my foundation piecing a lot easier!

Take your first two strips and layer them right sides together. These will be #1 & #2. Now take your muslin piece and with the drawn lines facing you, hold it up to a light source. I used my patio door as my light source for these pics. Place the layered strips behind the muslin. Make sure that these two pieces cover the stitch lines for #1 & #2. Pin in place to secure.

Shorten the stitch length on your machine. I set mine at a 1.8. Starting at the widest end of the strip, sew towards the narrow end through all of the fabrics. When you foundation piece, your fabrics are on the back of the muslin foundation and you stitch on the drawn foundation lines. Remember to back stitch.

Flip the muslin over and press the two strips open. You can see that they both completely cover #1 & #2.

Now the tricky part is trimming your seam. **I mentioned earlier in my Supply Chart notes that I did not use the Add-A-Quarter ruler so you won’t see me demonstrating cutting my seam with it. Instead I used my large cutting ruler. To trim the seam, fold all of the fabric, including the muslin, to the left, exposing only the raw edges the two fabrics you just stitched. Take your ruler and trim to a 1/4″ from the stitch line.

Press open again and head back over to your patio door!

Position the #3 fabric behind first two sewn strips. Notice that in the pic below that the #3 fabric is at least a 1/4″ beyond the #2 line that I will be stitching on. Pin in place and sew on the #2 line. Once again, starting from the bottom up towards the narrow end and back stitching. Trim seam. Press well!!

Repeat this process until all 8 strips are added. The last stitch line on each side of the muslin foundation are the stitch lines for piecing all 8 sections together. You only add 8 strips to each foundation piece.
Trim the block up to the muslin foundation. It’s ok to leave the bottom edge untrimmed. It will help when you are covering the Tuffet and can be trimmed after it’s stapled to the base. Sew 1/8″ around the edges to secure.
Here’s a pic of two completed sections…one from the front and one from the back. Refer to your pattern to complete the assembly of your pieced top.

TUFFET BASE:
Trace your template onto the foam and cut out 2 round cushions.

To make cutting easier, use an electric knife..you know, the kind Grandma cuts the turkey with? It’s perfect for this job too!…but I never cut meat with mine lol!

It’s ok that they’re not pretty cakes. They will be covered with batting and fabric to smooth out the rough edges.
Before using your spray adhesive, make sure that you are adhering the foam to the Tuffet top. I marked them as shown in the pics below.
The top of the Tuffet is where you will see the Tee Nuts.

The bottom of the Tuffet is where you will attach the Bun feet after you’re finished. The 2 small holes in the center are for the button attachment.

COVERING THE TUFFET: From the lyrics of Rob Base and DJ EZ Rock…🎶🎶”It takes two to make a thing go right“🎶🎶…you need a partner!
As I noted previously, I used leftover Warm & Natural batting because I couldn’t find upholstery batting. Upholstery batting is supposed to be more durable and won’t break down but I figured how bad can it be? It’s not like I’m going to be letting the kids jump on it or anything.
After your batting is on, ease the pieced top over it, keeping it centered. It helps if one of you stretch the pieced Tuffet onto the base while the other staples. Work from one side to the opposite. Pull tightly, add about 4 staples, turn 180 degrees , add a few more staples. Keep stapling until your top is securely attached. Try to staple about 3/4″ away from the edge of your base. If you go any further in, you risk getting too close to the drilled holes where the feet screw in. Keep working at it from opposing sides until you’re finished. Use lots of staples. Your arm will get tired! Check, double check, and even triple check to make sure that you’re keeping the piece centered. The last thing you want to discover after all your hard work is that your Tuffet is tipsy to one side. Trust me, I know..
ATTACHING THE BUTTON:

Follow the instructions in your Tuffet pattern to cover and attach your button using the upholstery thread. Pull tightly to secure and staple underneath.

COVERING THE BASE:
Using your 18″ freezer paper template, cut out a piece of coordinating wool felt to cover the wood base for the finishing touch. This step is completely optional but well worth it! Center your felt on the base. I used a bit of the upholstery spray to keep it from shifting too much while I worked. Using a mallet, hammer the tacks around the edge of the felt. Locate the drilled holes for the feet by touch and use small scissors to clip the holes where your Bun feet will be attached. I did this last because your felt may shift/stretch a little while your attaching it. Trim the felt close to the Tuffet edge if necessary.
For a more professional look, it’s best if you buy 2 boxes of the tacks. You’ll only use about 1/2 of the second. I misplaced my second box and as you can see from my photo, my Tuffet could have used a few more tacks. But that’s an easy fix for later, right!
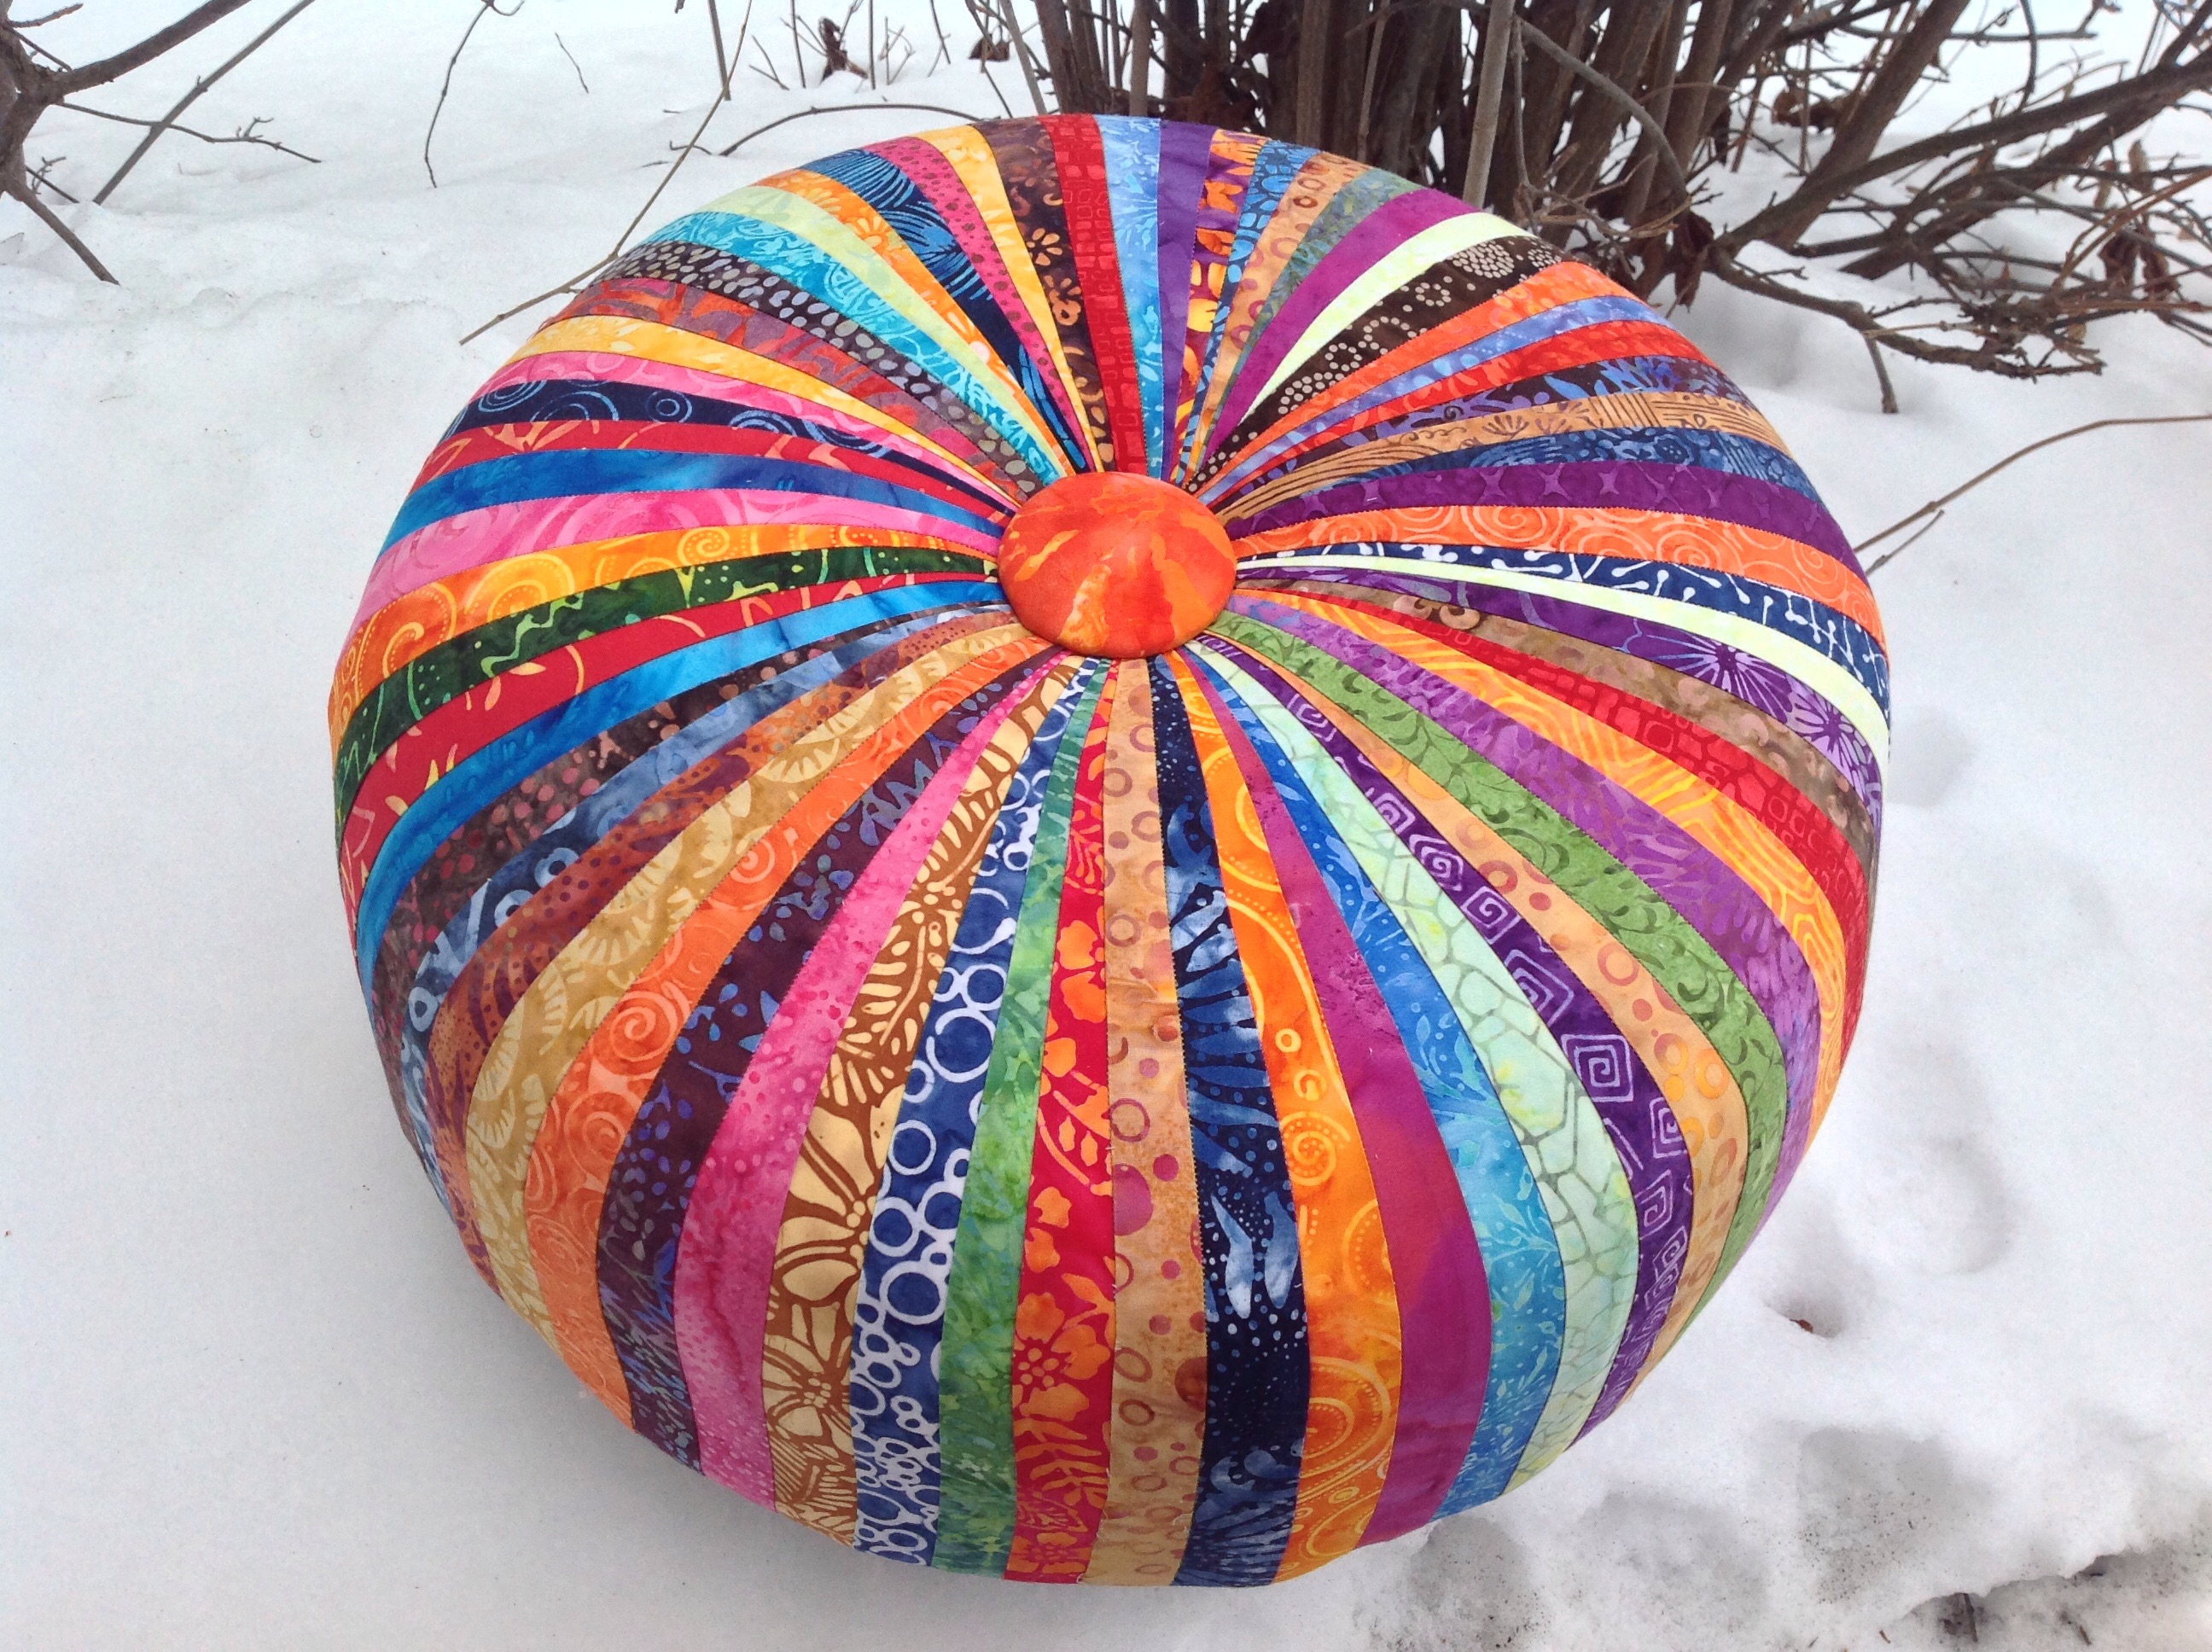
Screw your Bun feet into the base.

And you’re all set!
🎶🎶It takes two to make a thing go right
It takes two to make it outta sight🎶🎶
…or tea…or coffee. Whatever your favorite winter drink is, I’m sure it could use a little ‘glamming up’.
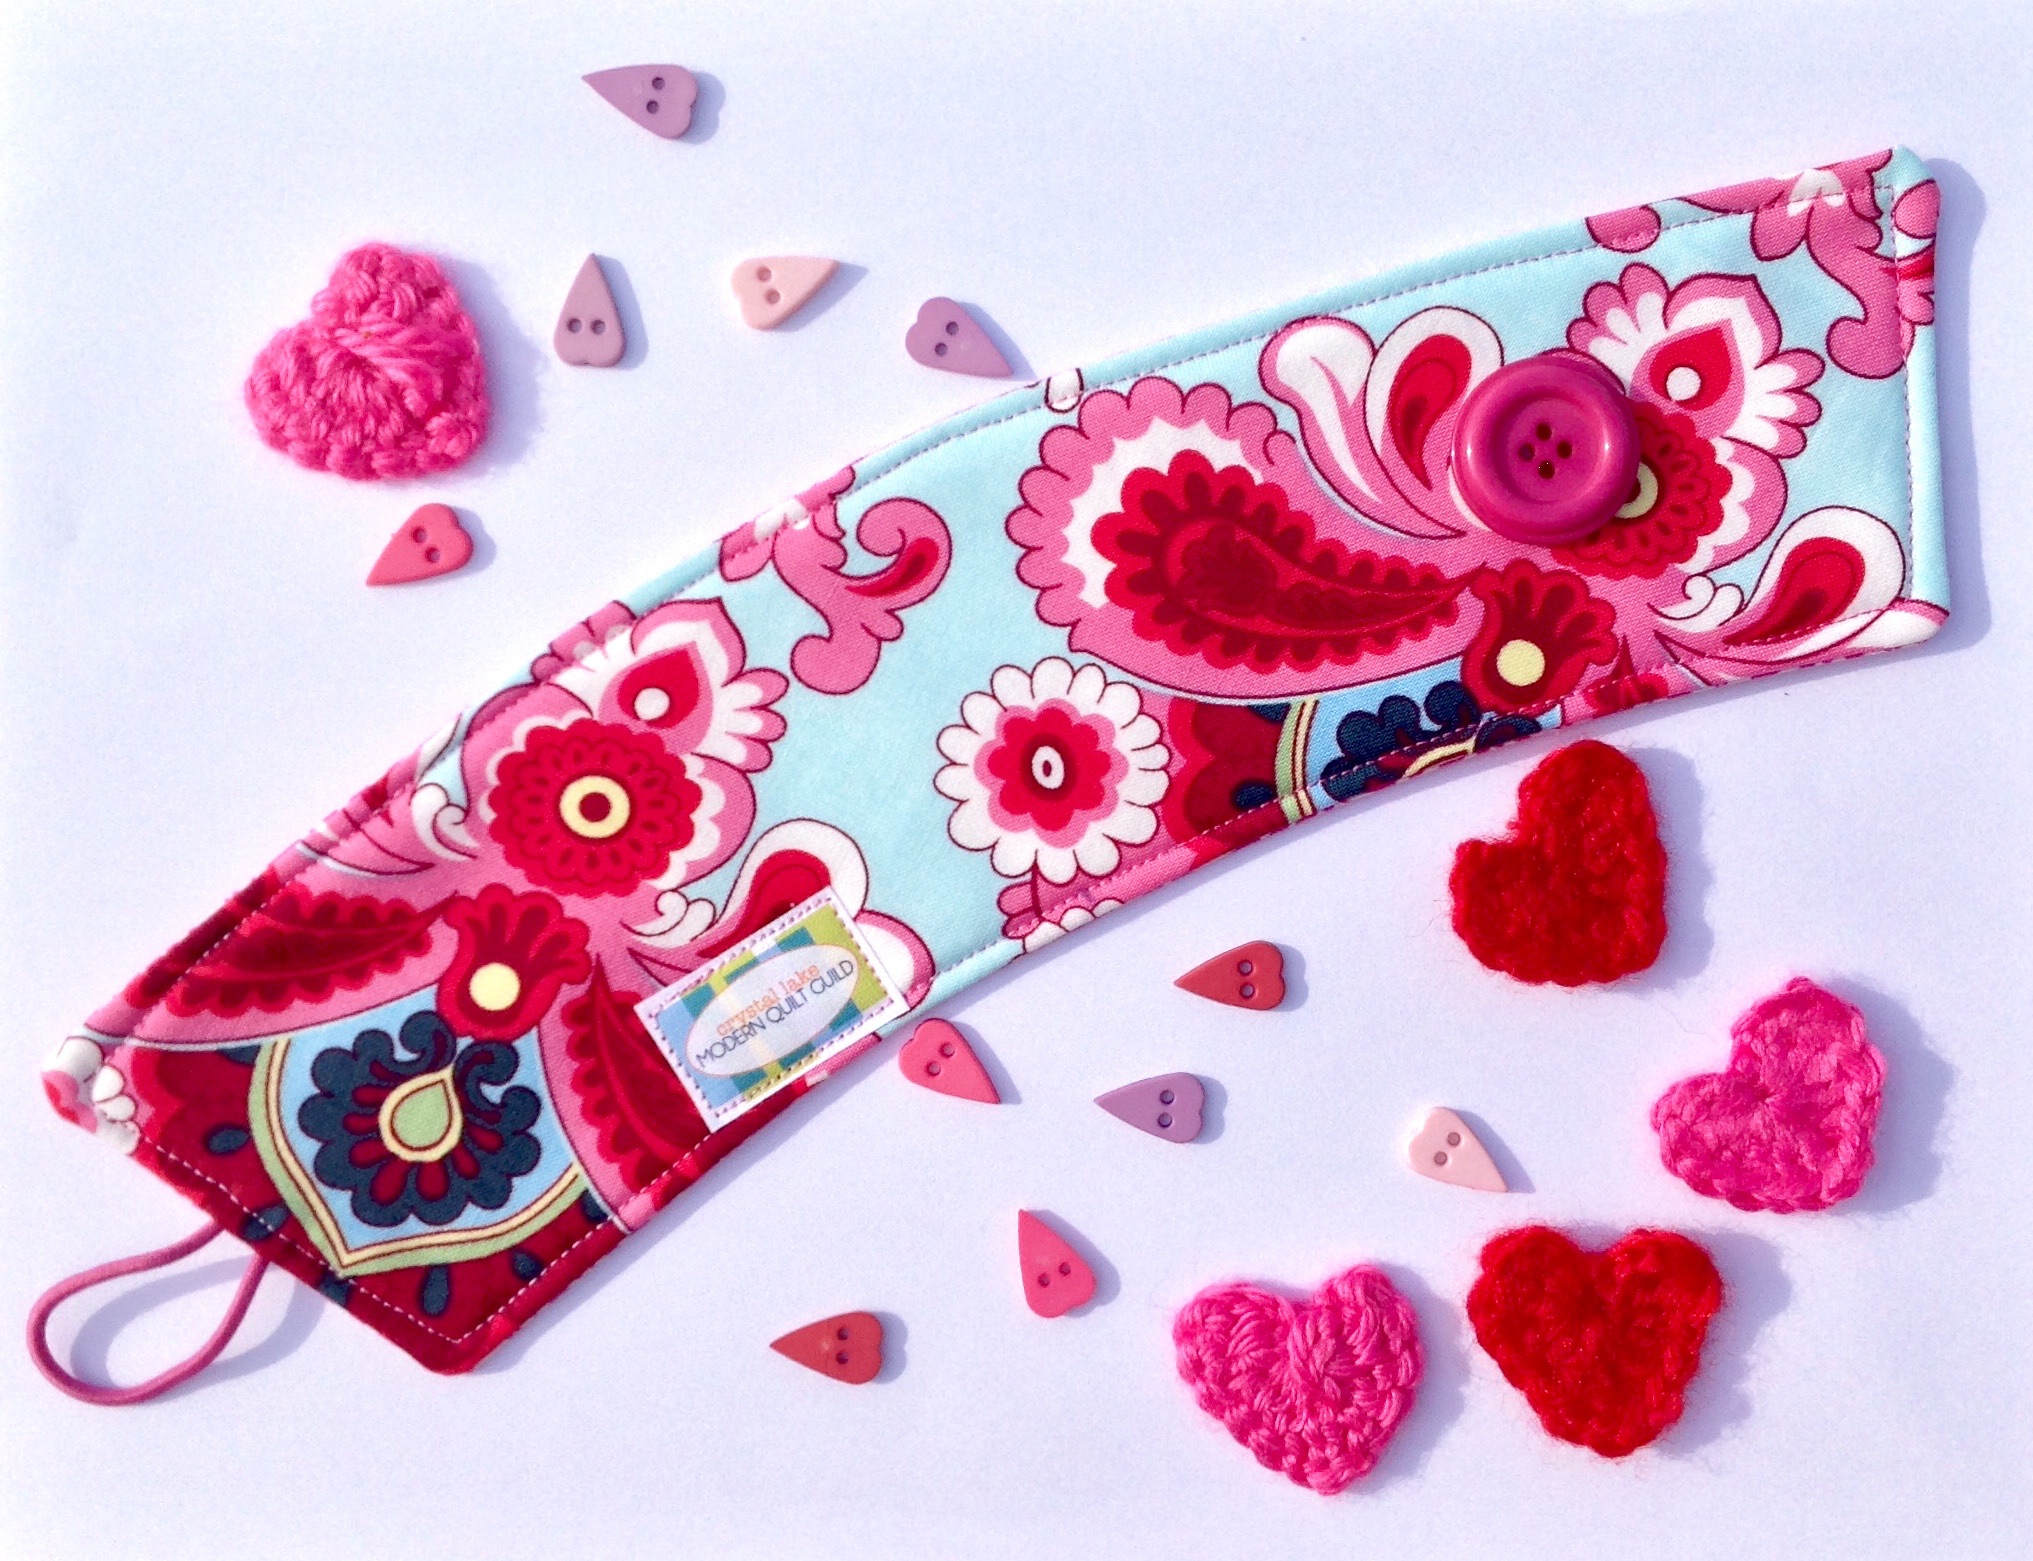
Or how about making a little something for your Sweetie Sewistas? 💕💕

If you’d like to surprise someone this Valentines, all it takes is the pattern, 2 pieces of scraps, a piece of batting, a button, and an elastic tie. You can find the colored elastic (hair)ties at Target. They’re the tiny, skinny ones in the girls section where the barrettes are found.

Follow the directions on the ‘Handmade Holidays‘ blog post found here. I eliminated the patchwork and embroidery this time. I simplified.

Finish up with your handmade fabric labels for a personal touch. Grab a gift card from Starbucks and toss some candy hearts inside your disposable cup! Yes. Starbucks will give you a free, unused cup if you ask sweetly!

I made these cozys for the CLMQG board members and one lucky girlie from the guild meeting gets to walk away with the one filled with goodies as a door prize for February. It’s not only filled with sweets, I added embellishments too, like cute buttons and sweet crocheted hearts(thanks mom)! Personalize your cup to suit your Valentine! ❤️
Label it Easy!
Label it Fast!
Label it Awesome!
A quick tutorial on how I made my own labels in Microsoft Word.
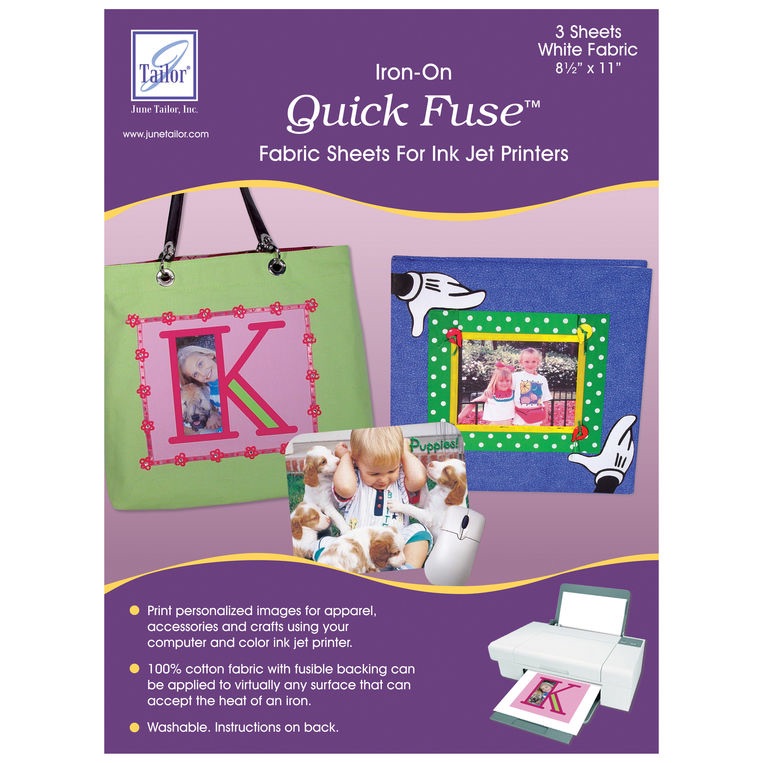
To create my fabric labels, I purchased the June Tailor Iron On Quick Fuse Fabric Sheets For Ink Jet Printers in white from Jo-Ann’s. This package came with three sheets @ $9.99. May seem a bit pricey but I used a coupon. And after everything was said and done, they ended up just costing around .07 cents apiece. Not bad if you ask me!
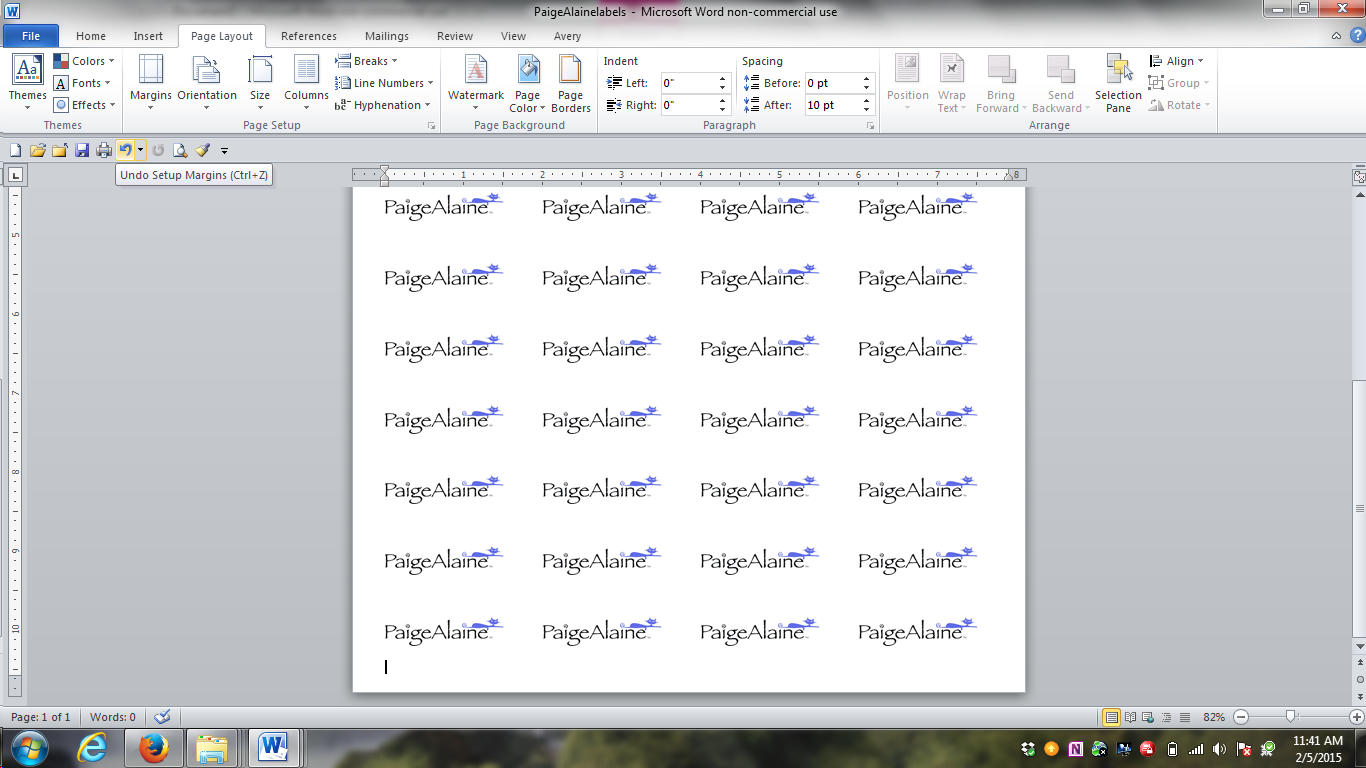
Open Microsoft Word.
From the Page Layout tab set your margins. Adjust the margins by clicking on custom margins at the bottom of the drop down menu and adjust the settings to .2 with the up/down arrows for the left, right, top & bottom. If needed, this can be adjusted later also.

From the Home tab, you can either design your Name by clicking on the Theme Fonts and size and typing your Name in…

And/Or choose a high resolution image to add from the Insert tab. This can be done one of two ways…To insert a picture, click on the Insert Tab on the header bar and click Picture. Choose a picture from your files. Or you can add a picture to word by copying a picture from your photos and pasting into the Word document. To do so, go to your photos, right click the desired photo, choose copy. Go back to your Word document and right click in the space, choose paste.


Adjust the size of your image by right clicking on the image and use the arrows to determine the height and width. Most of my labels were between the .5″ (height) & 2″ (width) range. This label is .37″ x 1.5″.

Once you have the dimensions that you like, right click to copy. Click off and next to the image, tab and paste the image to fill the row. Making sure you leave enough room to cut the labels out after they’re completed.

To make life a little easier, highlight the the row. Copy and paste the row to fill the page.

If you happen to end up with an extra page attached to your label page you just created, simply click on the blank page and hit the delete button on your keyboard to remove it. We don’t want to end up printing blank pages attached to our label pages.

Save your document. Print a sheet on regular paper to make sure that your sizing and spacing is exactly how you like it before inserting a sheet of the label paper. Make any necessary changes .
If it’s to your liking, remove all the printer paper from the loading tray and place a sheet of fabric label paper into the printer. Make sure it’s placed so that the labels will print on the fabric side, not the shiny, fusible side. For my printer that means loading the fabric side of the sheet face down…
Only print one sheet at a time!
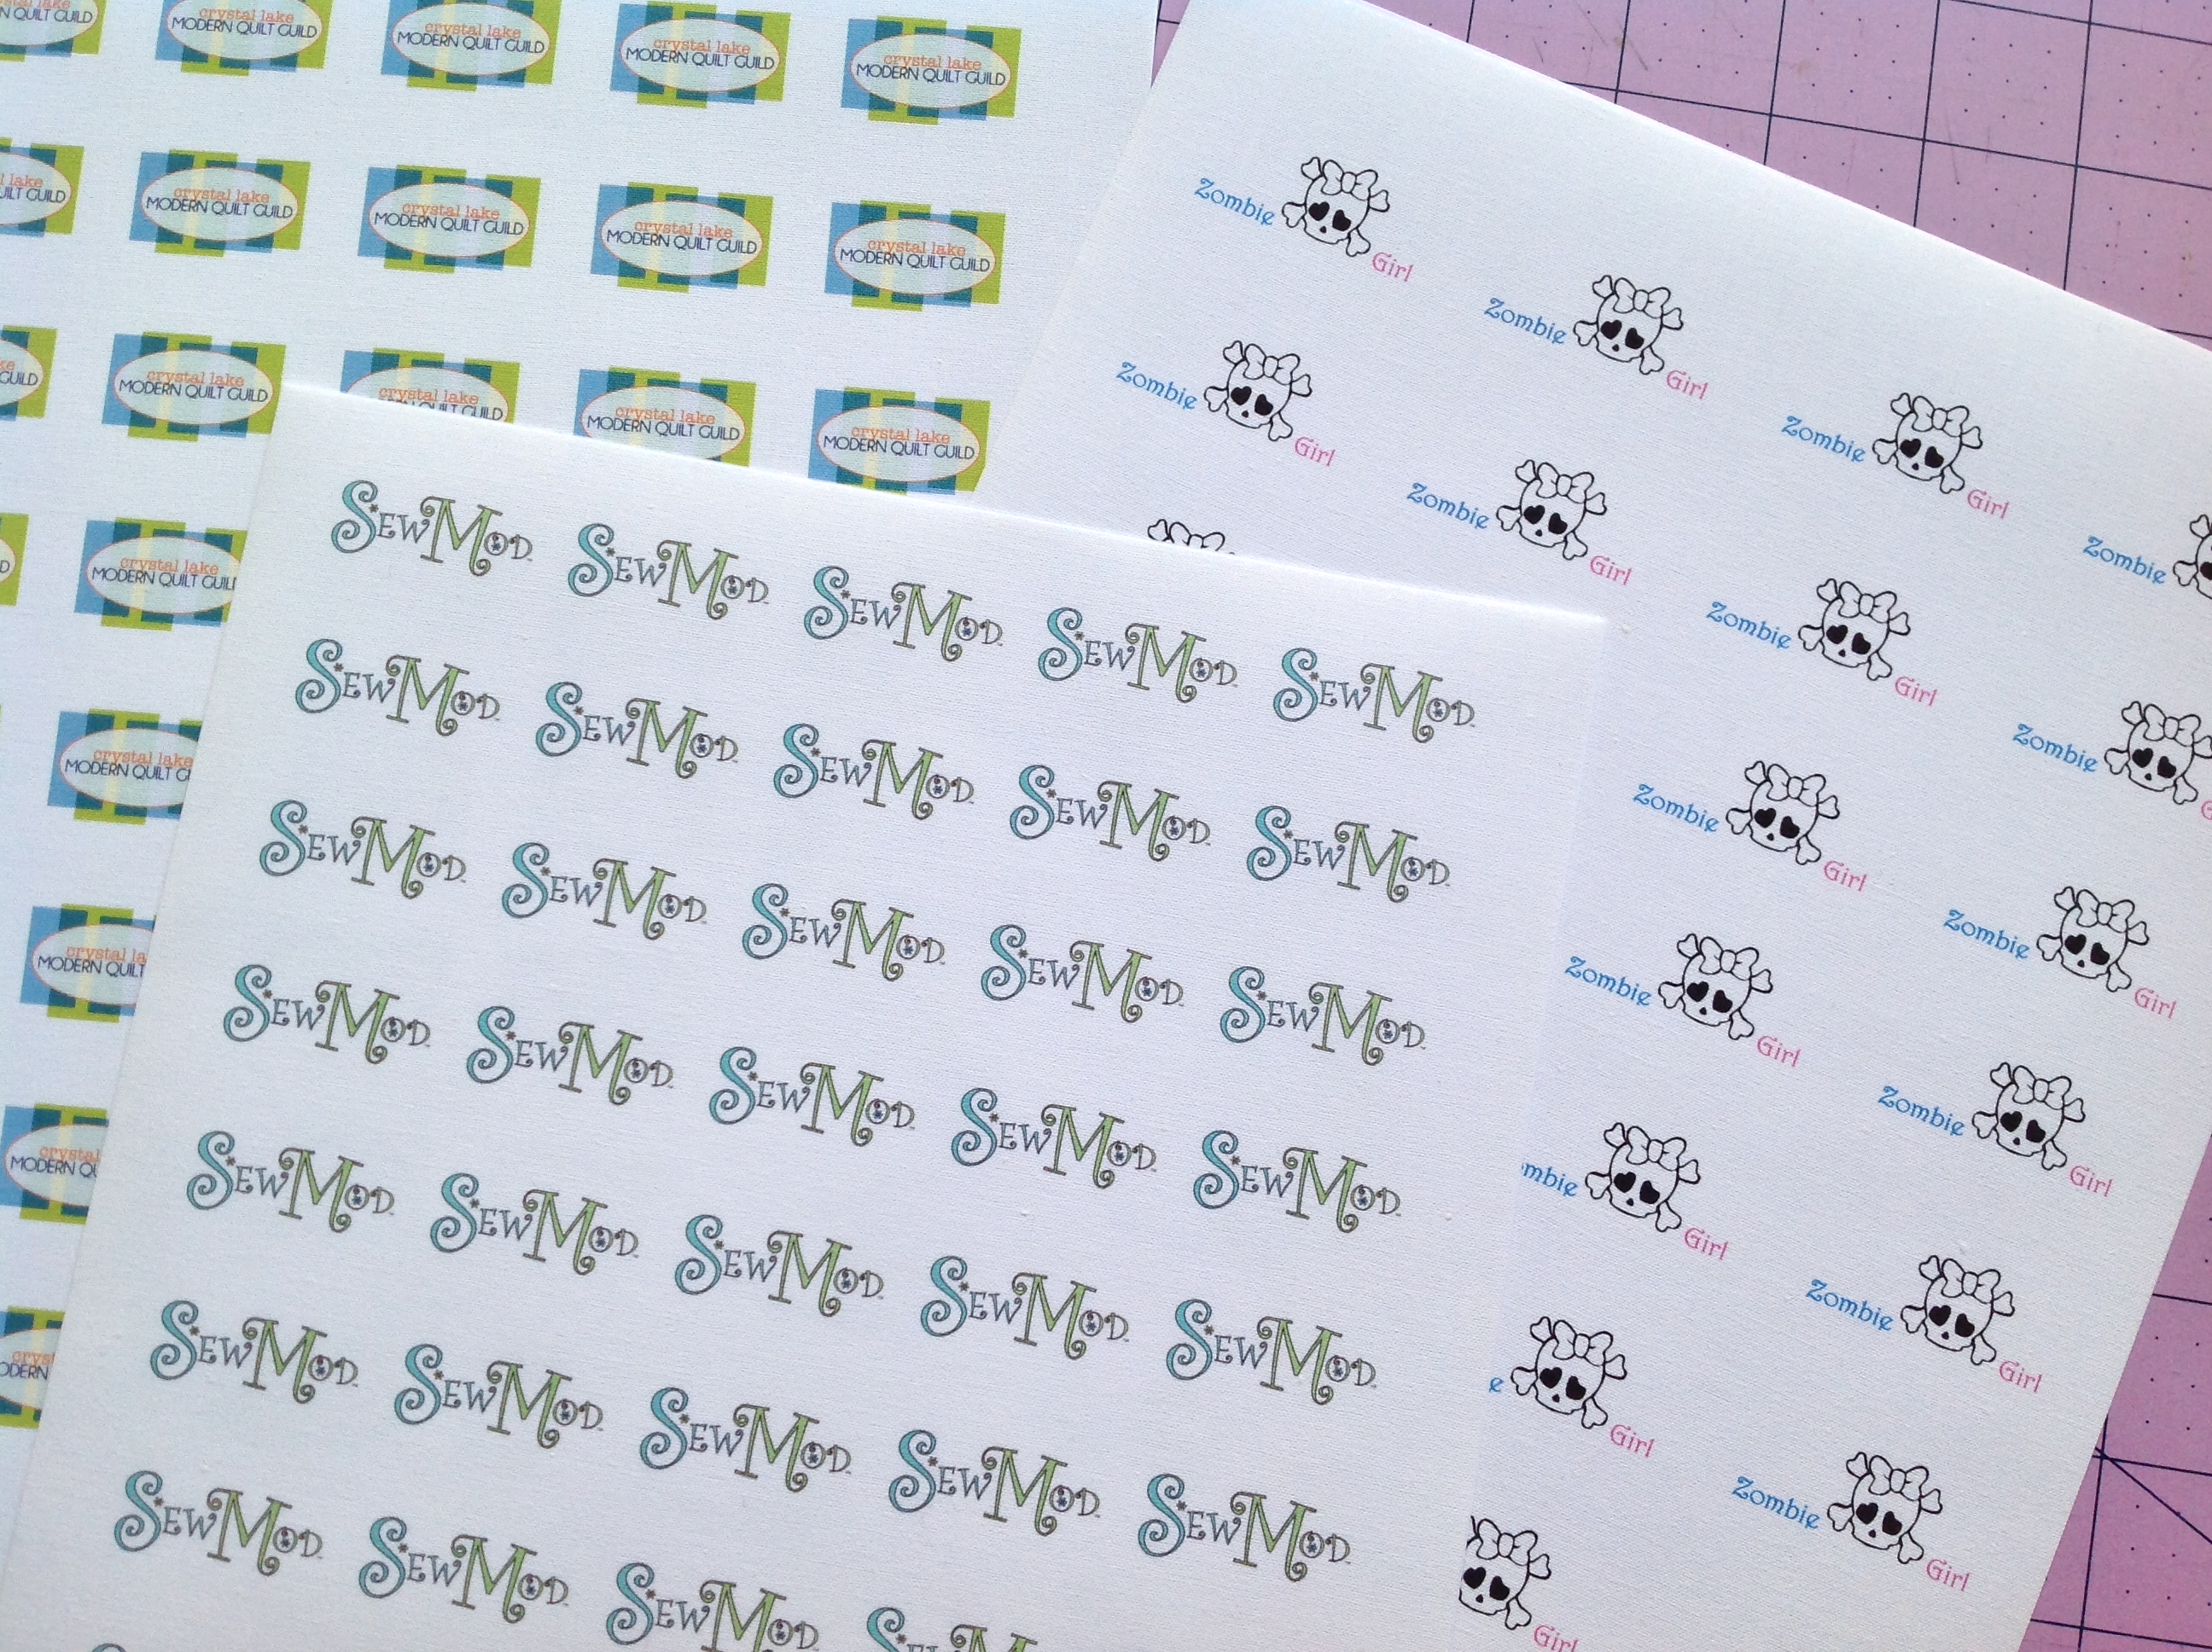
Let dry a bit..a few minutes. Cut your labels apart using scissors or a ruler & rotary cutter and do a happy dance because you just saved yourself some $$ and made some cute labels!

Now go make something fabulous and put your name on it!


