
You are currently browsing the category archive for the ‘patterns’ category.
You know what time it is…Christmas in July. Time to get that list made of all the handmade items you’d like to make before Christmas so that you’re not stressed during the season. The Dresden tablerunner was 1st on my list and now it can be on yours too because we’ve made it simple for you by adding it to the shop as a kit and added the easy tutorial for the fat quarter napkins.

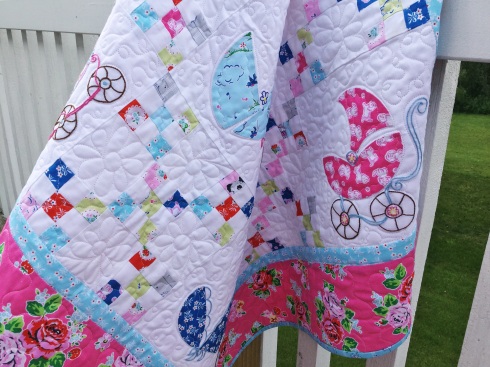
This lovely was made from Lecien’s Flower Sugar Holiday line. The Flower Sugar lines are consistently beautiful if you ask me and I think Lecien has once again out done themselves with the large florals and poinsettias, tossed candies and swirling ornaments. The Dresden centers are set on an aqua dot which is then carried to the flange around the binding to tie the fabrics together.

Your Christmas table will not get any prettier than this!


And didn’t Paige do a beautiful job quilting it? Makes me wish it was Christmas now 🎄❄️
We have the KIT available as well as the pattern. Kit comes complete with all of the fabrics, including the backing. Batting and the fat quarters to make the napkins are NOT included. Runner measures approx. 21″ x 67″.
Get a jump start on your holiday sewing!
SewMod is revamping all our patterns. Over the next couple of weeks, I’ll be showing off some new samples I made for the covers and the one I’m most excited about is Sassy Strollers. I didn’t think I could find any cuter fabric than the original one I had made but oh how I was wrong.

I’m a huge fan of Elea Lutz’s work and when the news of Strawberry Biscuit hit I was all over that in a heartbeat ❤️. Rarely do I order complete lines of fabric. Let’s face it, I want to, but my budget here at SewMod does not allow it! But I had to do it this time. I just had to. It’s perfect for the Sassy Strollers pattern cover and kits.

I really enjoy anything I can combine my faves into…applique & embroidery. Isn’t this just the sweetest?! Strawberry cake and the cute little bear riding a turtle. Oh my goodness.


Sassy Strollers comes in three different color ways with your choice of borders along with a patchwork backing that coordinates with each print. The pink color way comes with a blue binding shown in the quilt photos and the gray & blue option has a red floral binding.


Hard to choose your favorite right? Whichever one you go with will be gorgeous. No doubt!

Paige did a fab job quilting it for me.👏👏
Complete kit includes all of the fabric to make this bundle of joy except the embroidery floss and batting. Quilt measures 40″ x 40″. You can find the pattern, KIT, select fabrics from the line and fat quarter sets in the SewModDesigns Etsy shop.
Catch-up part 5…we’re almost done!
If you love it, you will save it. Every bitty piece of the line! This is not a typical trait of mine but I’m so glad that I did just that with Tasha Noel’s Vintage Market line.

I mean how the heck can you even discard this cuteness to the trash can anyway!?!
It came into good use when I decided to have a sew day with Paige. We worked all day on the Scrap Happy Purse pattern by Crazy Mom Quilts.

We had a blast making these! We get so much accomplished during our sew days. I love to try to have the girls over once a month. We usually pick a Saturday and start bright and early, about 9am. I fix lunch, there’s always wine involved, and we usually end with a finished project. I like to keep everybody on track!

You need about 200 skinny scraps for the front and back panel. That sounds like a lot but once you start cutting it really isn’t. I actually had leftovers…which I did not toss away…
The only difficult part of the pattern is attaching the handles. It takes time, working your needle through the leather. I’d suggest getting the tool to help with that, which Dritz makes, or puncturing the premade holes in the strap to help your needle slide in and out of easier. Check out this tutorial on how to use the Speedy Stitcher from Dritz at Sew4Home. This handy tool is definitely on my list to buy next time I come across one. Anyone out there ever use this?

Just in case someone tried to run away with my sweet little purse, I added my name label to it along with a cute embroidered heart! Lol
Paige decided on a more scrappy look, using up some of her leftover fabrics.

The Scrap Happy Purse pattern can be found along with the cute red & white polka dot handles in the SewMod Etsy shop. Sadly, all of my Vinatge Market fabric is sold out but don’t fret, I’m awaiting a new shipment!
Now that we’re all caught up from last year, I’m going to try to stay on track. Oh…who am I kidding lol.
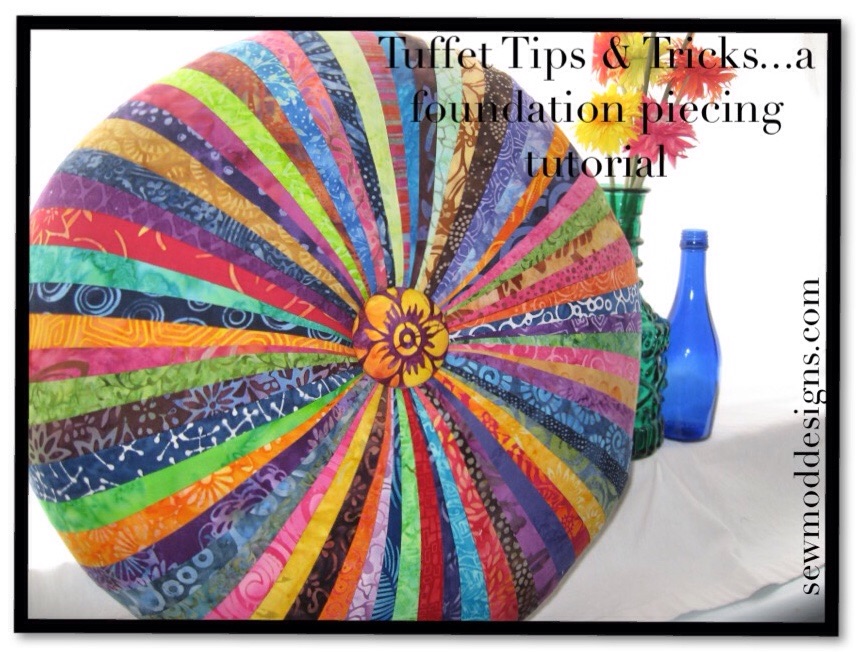
I know you love the the round Tuffet but did you know there’s also a square one! Yes, it’s true. It’s hip to be square!

Reqiring basically the same supplies and techniques. Except, of course, it needs a square board! Pattern comes with 5 pages of detailed instructions and full size templates.
Click on the pattern pic above to order your tuffet today!
I get pretty dang excited when I sell a Tuffet pattern. Especially when I sell several of them to the same part of the country. Which means most likely, that a quilt shop is having a class. Somebody’s having a Tuffet Party!
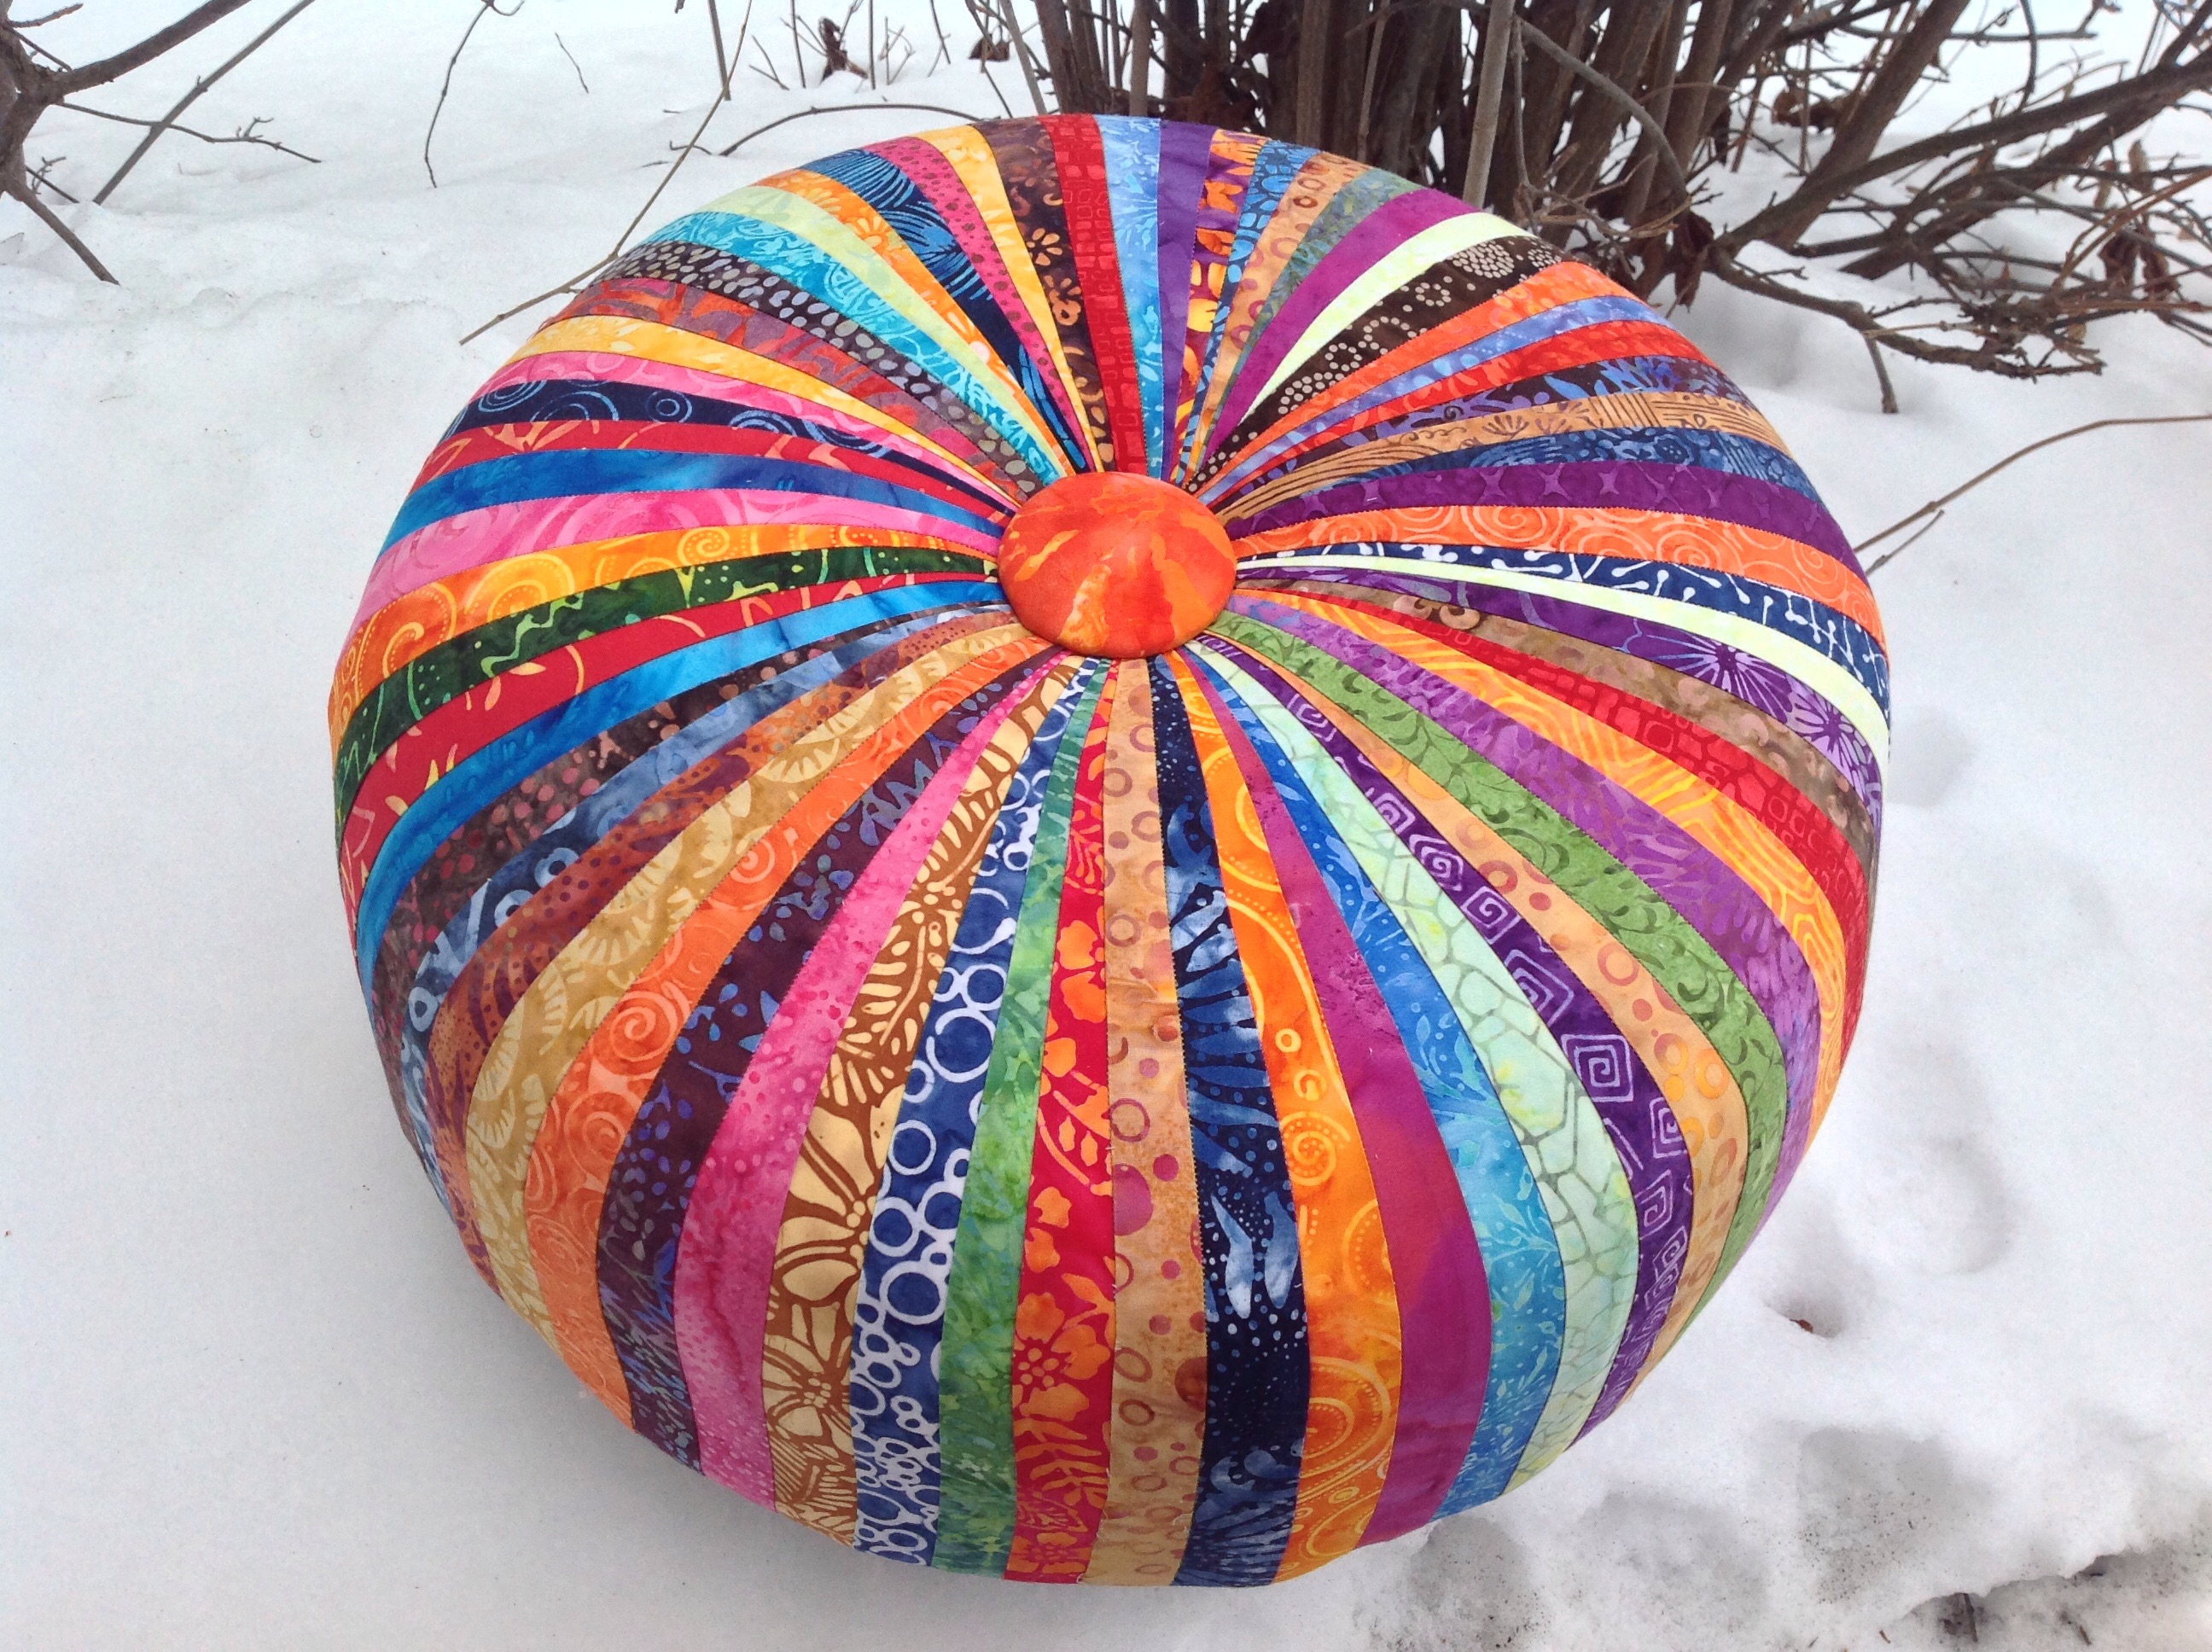
I get all kinds of questions about the innards and the how-to on assembling the Tuffet, where to buy supplies, what fabrics to use, etc. So today, I’m gonna kill two birds with one stone. I’m going to finish up my UFO Tuffet and answer some of my customers pressing questions.
Because let’s face it, this list of supplies might seem a little daunting. But don’t fret, everything can be easily found at your LQS, craft or hardware store. The only thing you might have trouble finding, is your handyman.
I put a supply chart together showing the Supply, The Use, Where To Buy, Cost, & any Comments I have that might help. **This is for guidance purposes only** You can buy whatever you want from whomever you’d like. I’m only stating what I purchased and from where to try to help anyone making the Tuffets. If you’re taking a class at your LQS, there will likely be a Tuffet kit available for purchase. I highly recommend buying the kit. Unfortunately, for our party, we weren’t that lucky and we had to figure it out on our own. I hope this helps and you enjoy making your Tuffets as much as we did!
So let’s get this party started, shall we?
First you need The Tuffet pattern by Myra Mitchell. The foundation piecing demo and tips provided does not, in any way, replace the fact that you still need the pattern! I’ve only provided you with TIPS for building your Tuffet, not instructions on assembly. You don’t want to invest all your time and $$ in this project, only to realize that your missing key steps and correct templates. Even I still refer to my pattern for each Tuffet I assemble!
UPDATE: 01/04/18 SewMod is sold out of the Tuffet patterns. Please visit Etsy.com to purchase a tuffet pattern from a sewing or quilt store.

UPDATE 3/8/16: Myra has changed the board dimensions on the most RECENT patterns from a 18″ round plywood to a 17″ round plywood. All other supplies remain the same including the 18″ foam pieces. PLEASE NOTE this when printing off the PDF below.
SUPPLIES:Click on the table below to enlarge OR download the PDF as a reference HERE

**Remember that if you’re buying items from your local big box fabric & craft store, to use your coupons to significantly reduce the prices on select items.
**Items such as needles, adhesive spray, stain, & freezer paper can be shared if you’re making Tuffets with your friends!
FOUNDATION PIECING:The method of stitching your fabric pieces directly onto a foundation fabric such as muslin.
Foundation piecing onto the muslin will provide support and stability to this project and keep the fabrics from stretching when you begin to attach them to the base. Muslin will not pull apart.
Once you’ve traced your foundation template onto freezer paper and cut the muslin fabric pieces, trace the stitching lines. You can see from the pic that if you use a Sharpie to trace the stitching lines onto the freezer paper, you will be able to easily see through the muslin for tracing. I used a ruler and a Pigma pen to trace my lines onto the muslin. Make sure to trace the numbers from the pattern onto the muslin.

I used my leftover Batik scraps from various projects to make this Tuffet. I like using scrap pieces that are at least 2-1/2″W x 22″L . It makes my foundation piecing a lot easier!

Take your first two strips and layer them right sides together. These will be #1 & #2. Now take your muslin piece and with the drawn lines facing you, hold it up to a light source. I used my patio door as my light source for these pics. Place the layered strips behind the muslin. Make sure that these two pieces cover the stitch lines for #1 & #2. Pin in place to secure.

Shorten the stitch length on your machine. I set mine at a 1.8. Starting at the widest end of the strip, sew towards the narrow end through all of the fabrics. When you foundation piece, your fabrics are on the back of the muslin foundation and you stitch on the drawn foundation lines. Remember to back stitch.

Flip the muslin over and press the two strips open. You can see that they both completely cover #1 & #2.

Now the tricky part is trimming your seam. **I mentioned earlier in my Supply Chart notes that I did not use the Add-A-Quarter ruler so you won’t see me demonstrating cutting my seam with it. Instead I used my large cutting ruler. To trim the seam, fold all of the fabric, including the muslin, to the left, exposing only the raw edges the two fabrics you just stitched. Take your ruler and trim to a 1/4″ from the stitch line.

Press open again and head back over to your patio door!

Position the #3 fabric behind first two sewn strips. Notice that in the pic below that the #3 fabric is at least a 1/4″ beyond the #2 line that I will be stitching on. Pin in place and sew on the #2 line. Once again, starting from the bottom up towards the narrow end and back stitching. Trim seam. Press well!!

Repeat this process until all 8 strips are added. The last stitch line on each side of the muslin foundation are the stitch lines for piecing all 8 sections together. You only add 8 strips to each foundation piece.
Trim the block up to the muslin foundation. It’s ok to leave the bottom edge untrimmed. It will help when you are covering the Tuffet and can be trimmed after it’s stapled to the base. Sew 1/8″ around the edges to secure.
Here’s a pic of two completed sections…one from the front and one from the back. Refer to your pattern to complete the assembly of your pieced top.

TUFFET BASE:
Trace your template onto the foam and cut out 2 round cushions.

To make cutting easier, use an electric knife..you know, the kind Grandma cuts the turkey with? It’s perfect for this job too!…but I never cut meat with mine lol!

It’s ok that they’re not pretty cakes. They will be covered with batting and fabric to smooth out the rough edges.
Before using your spray adhesive, make sure that you are adhering the foam to the Tuffet top. I marked them as shown in the pics below.
The top of the Tuffet is where you will see the Tee Nuts.

The bottom of the Tuffet is where you will attach the Bun feet after you’re finished. The 2 small holes in the center are for the button attachment.

COVERING THE TUFFET: From the lyrics of Rob Base and DJ EZ Rock…🎶🎶”It takes two to make a thing go right“🎶🎶…you need a partner!
As I noted previously, I used leftover Warm & Natural batting because I couldn’t find upholstery batting. Upholstery batting is supposed to be more durable and won’t break down but I figured how bad can it be? It’s not like I’m going to be letting the kids jump on it or anything.
After your batting is on, ease the pieced top over it, keeping it centered. It helps if one of you stretch the pieced Tuffet onto the base while the other staples. Work from one side to the opposite. Pull tightly, add about 4 staples, turn 180 degrees , add a few more staples. Keep stapling until your top is securely attached. Try to staple about 3/4″ away from the edge of your base. If you go any further in, you risk getting too close to the drilled holes where the feet screw in. Keep working at it from opposing sides until you’re finished. Use lots of staples. Your arm will get tired! Check, double check, and even triple check to make sure that you’re keeping the piece centered. The last thing you want to discover after all your hard work is that your Tuffet is tipsy to one side. Trust me, I know..
ATTACHING THE BUTTON:

Follow the instructions in your Tuffet pattern to cover and attach your button using the upholstery thread. Pull tightly to secure and staple underneath.

COVERING THE BASE:
Using your 18″ freezer paper template, cut out a piece of coordinating wool felt to cover the wood base for the finishing touch. This step is completely optional but well worth it! Center your felt on the base. I used a bit of the upholstery spray to keep it from shifting too much while I worked. Using a mallet, hammer the tacks around the edge of the felt. Locate the drilled holes for the feet by touch and use small scissors to clip the holes where your Bun feet will be attached. I did this last because your felt may shift/stretch a little while your attaching it. Trim the felt close to the Tuffet edge if necessary.
For a more professional look, it’s best if you buy 2 boxes of the tacks. You’ll only use about 1/2 of the second. I misplaced my second box and as you can see from my photo, my Tuffet could have used a few more tacks. But that’s an easy fix for later, right!
Screw your Bun feet into the base.

And you’re all set!
🎶🎶It takes two to make a thing go right
It takes two to make it outta sight🎶🎶
As you know, Wendy and I get together during the week to work on projects. Sometimes they end up in the garbage after a hard days sewing..and no, not just because we might be day drinking…and other times the universe smiles upon us and we each walk away from the day with a little something special that we can pat ourselves on the back for.
Yesterday was just that sort of day! We’ve been wanting to make this Lollipop Bags pattern from Atkinson Designs for a while now and since we have the pattern available in the shop, then there’s no better time for a pattern review for everyone who’s thinking of purchasing it.

I assured Wendy that, as with any Atkinson Design I’ve tried, the pattern would be easy to follow and have clear instructions with photos. I was right. Her signature zipper instruction was good…step by step and at NO time did I think to myself…how’s this gonna work!?! You will never fear another zipper again.

Even the cute fabric flower was a snap to make. The hardest part of the pattern was just taking the time to turn the flower strip inside out.
The only thing I think I’d do different, is add a light weight fusible interfacing to the clutch strap for more stability and I might mix it up a bit by quilting my next one. You could even personalize it with a charm zipper pull, especially if you’re going to leave the flower off.
Other than that, I’d give this pattern an A+. It’s cute. It’s easy. We finished two in one day!

What are the other treats besides Lollipops, you ask?
We have lots of new patterns to add to your to-do’s for this year in the shop. Click HERE to view all of the patterns we carry in the SewModDesigns Etsy shop.


Have you met Wendy? She’s the newest designer for SewMod. Wendy is a longtime Yogi and creator of YogaMod. Being a Sewista and health conscious, it’s only fitting that her first design be reflective of that.

She’s designed a Yoga Mat Sling with Fashion, Form & Function in mind.
Fashion: She uses the latest modern fabrics. The possibilities are endless when it comes to personalizing the sling with all of the trending fabrics. You could have one made for each outfit!

Form:The Sling is versatile and can be worn over the shoulder or across the body.The metal hardware keeps it secure and your mat won’t slip. The length is easily adjustable using the loops. Bring them closer together for a longer strap and further apart to shorten.
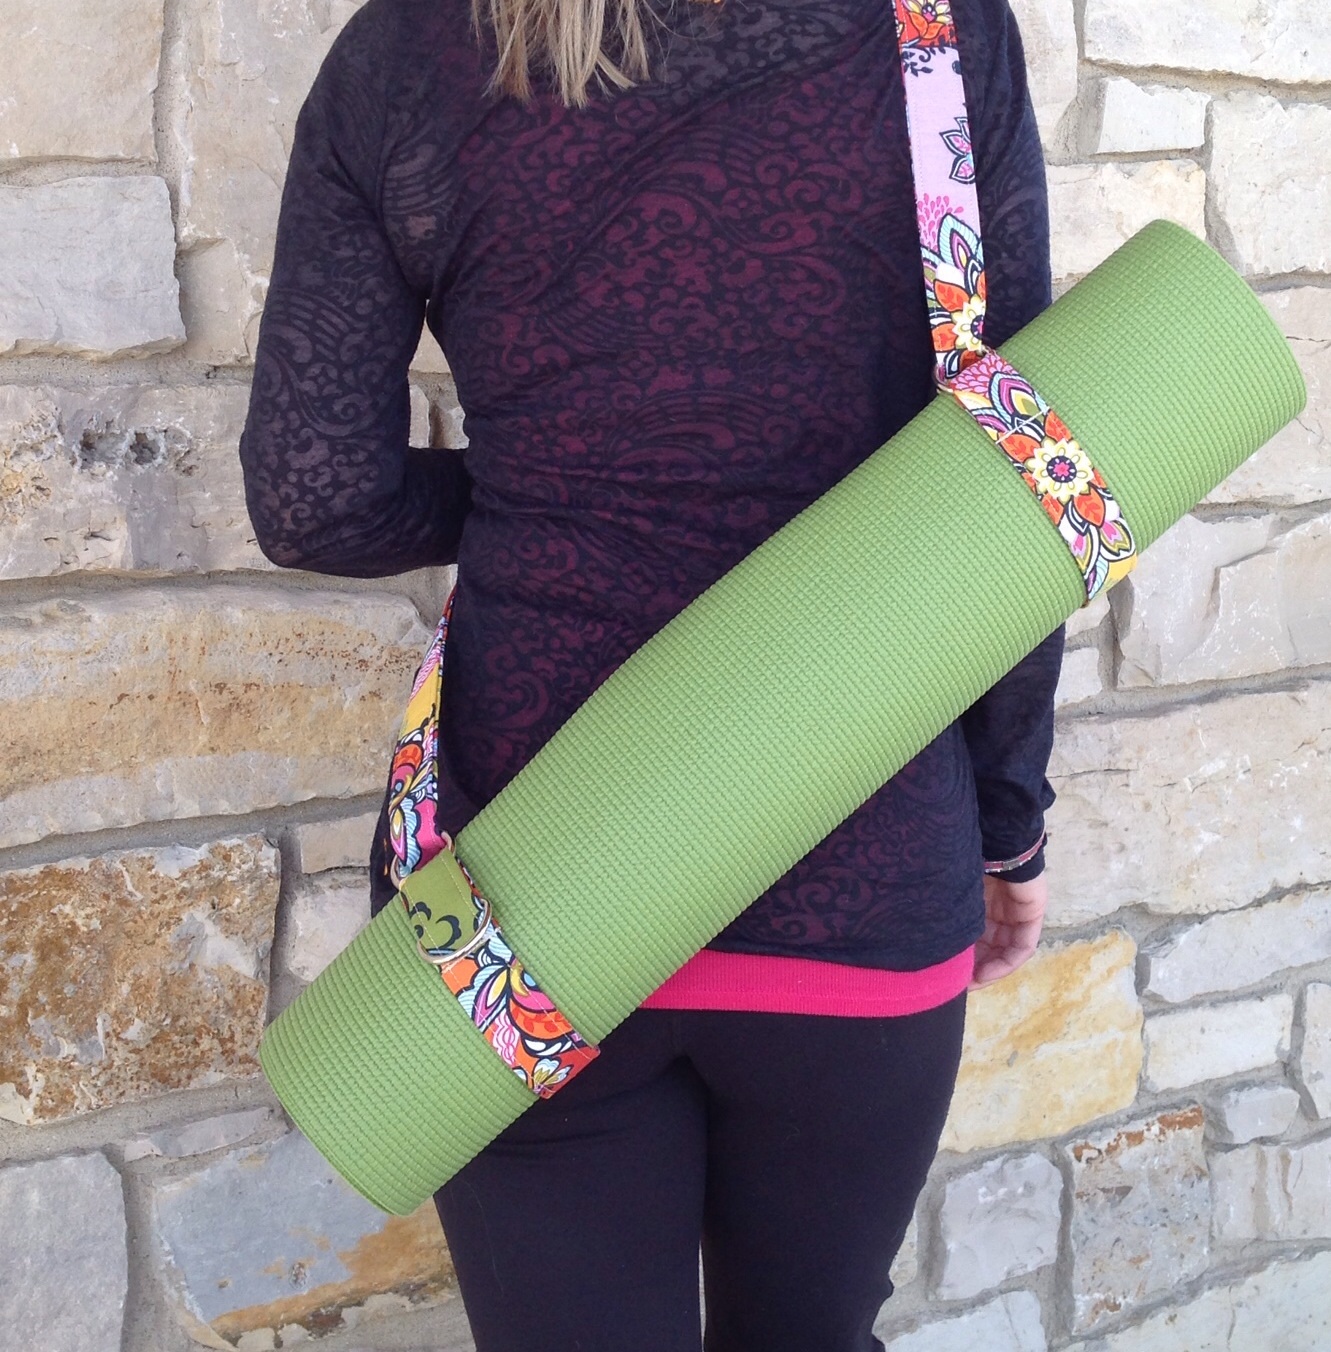
Function: . The Sling can accommodate more than one mat or a towel.
The extra D-Ring allows you to attach your keys, small wallet or a personal accessory.

The pattern is in a downloadable PDF and hard copy and it’s designed with step by step photo instructions making the assembly easy peasy! We have the Sling available in pre-cut kits including the metal hardware. And we also have the option of buying one handcrafted by SewMod. So stop by the shop and check them out!
We look forward to more ideas Wendy has to share. And maybe she can also provide us with stretching and relaxation techniques too. I know we could all use that after sewing all day!
Get your glue gun. Gather your two favorite christmas fat quarters. Don’t forget your crafty fun supplies like buttons, trim, stickers. Let’s make a Glitter Village!
I spent the day with great friends working on this crafty project. Some of the girls came over and we made these cute houses from Terry Atkinson’s pattern “Glitter Village”.

Pretty simple. Lots of cutting, but what isn’t I guess. No sewing required! It’s all assembled with Heat and Bond and double sided heavy Peltex.
We had a lot of fun decorating them!

Mine of course was not made in traditional colors. I love the turquoise and pinks that are in so many Christmas decorations now.

Paige made a modern, whimsy Christmas house with bright pink fringe and a purple polka dot roof!

Two of the girls decided on grays. This one is the classy house on the block!

And this one is super cute with the little fairy house fabric from Cinderberries.

And these two houses were done in traditional cuteness!

Isn’t that the cutest ruffle roof!

Pick up one of the patterns and get started on your own little village. Lots of fun!
Almost.
I did get some work done this week. I managed to do some finishes and start a new Christmas quilt. Christmas.Shocking. I know:) Love me some Christmas and what better time than July with this scorching heat wave than to sit in an air conditioned studio and wish for cooler temperatures. So that’s exactly what I’ve been doing. I’m going to make you wait for the newest one I just finished. I’m waiting for Paige to work her quilty magic on it before I reveal. But here’s what I’ve done so far this week….
I added this cute Alpine Wonderland Christmas Quilt kit to Etsy yesterday. We used the Summer Tweets quilt pattern that Paige and I designed because it showcases large scale prints and the main fabrics in Alpine Wonderland are so darn cute I couldn’t bear to cut it up. Kit comes with the free pattern.

Paige quilted it in an all over stipple.

Chain Reaction is finally ready and added to Etsy as well. This is one of my faves! Very modern looking. We used all of the Art Gallery prints we had in stock to create a scrappy modern quilt. Paige picked an excellent all over quilt design to enhance the look. Kona white and Kona Ash Grey are the coordinating solids.


And last, I hung the finished Sassafras quilt in my living room. Paige also did an all over design on this since it was so busy but added some special touches to the cone flowers.


Today I’m off with Shelley over at Elsie’s Girl for the downtown Crystal Lake Sidewalk Sale. I hope I come home with lots of good finds and bargains to share with you! Talk soon!
We’re excited to release a PDF version of our Cannon Beach pattern released this past March. The PDF version has lots of pictures to support each step with more detail to give even a beginner quilter, looking for a challenge, the help to complete this quilt with ease.
The original quilt design was inspired by my trip to Cannon Beach, Oregon in 2010 with my mom, sister and one of my longest and dearest friends, Karen –it was such a memorable trip for me, and everything was so beautiful.


When I stumbled upon a bundle of Denyse Schmidt’s Hope Valley fabrics the images above, forever embedded in my mind seem to flow right thru the fabric into this giant Dresden design.


The machine quilting design seemed to flow just as easy once the quilt was loaded onto the Gammill. I started from the center and continued outward with concentric circular patterns, changing the design with each circle. This photo was taken when the sun was perfectly diffused thru the window over my front door – the quilting popped and the quilt came alive! This is definitely my favorite picture.

The small half Dresdens in the corners were quilted similarly.

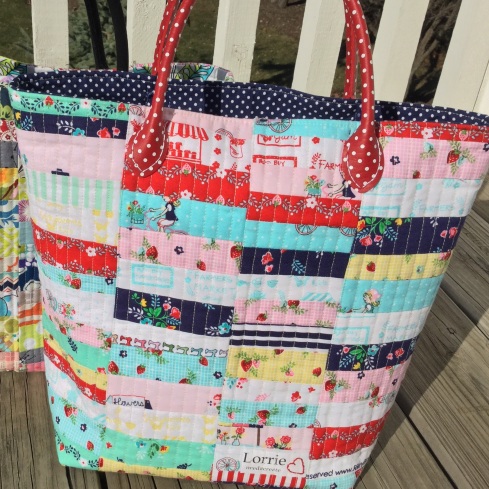
When we received the Midnight Garden fabric line by Sandy Henderson for Michael Miller, Lorrie was inspired to make her version of the pattern. She added some Art Gallery Bespoken and Oval Elements, and one of Joel Dewberry Heirloom fabrics –they all went together so very nicely. I love how fabric can reflect a quilter’s vision, personality and inspiration so differently.

Isn’t the Midnight Garden Gate the perfect center! Lorrie requested a swirl pattern so I quilted each blade from the center outward to the tip.


The large center Dresden was made using Marilyn Doheny’s 25” 9-degree Wedge Ruler and the smaller outer half Dresdens were made using the Easy Dresden tool by Darlene Zimmerman. See Lorrie’s Easy Dresden Demo on how to use. These tools are so versatile and I highly recommend getting them so you can create any size Dresden and acrylic rulers do make it easier to cut multiple wedges. As a bonus though, we included paper templates for the specific size wedges in the Cannon Beach pattern.
We had such great feedback on this fabric line, Lorrie made up kitsfor this version which include a free pattern. Kits, PDF patterns and the original hardcopy version are all available in our Etsy shop!


